Why Choose Google Sheets Over Excel?
Given that Google sheets is a relative newcomer to the spreadsheet product category, it’s helpful to look at the reasons users initially try and eventually choose it over an established offering like Excel.
First and foremost, it’s free: You will never need to purchase any software licenses, pay any subscription fees, or hire an IT consultant to configure, deploy, or maintain it. Note: Sheets is also included in Google’s G Suite, which is a subscription-based service for businesses.
Easy collaboration: It’s easy to share files, and users can all work on the same spreadsheet simultaneously. To contact a collaborator, either chat live within a spreadsheet, or leave a comment for review.
It’s cloud-based: Because files can be edited, viewed, and shared by users anytime and from any device, Google Sheets provides a “single version of the truth” to help avoid communication or version-control issues among collaborators and teams.
Importing data is easy: Pull in information from other Google services, or directly from the web.
Running scripts is simple: Use Java-based Google Apps Scripts and easily connect to APIs.
Reference previous revisions with one click: Find out which users have edited a file, along with the edits each has made.
It works with Excel: Google Sheets lets users open Excel files, and convert them to Google Sheets, and vice versa.
Getting Started with Google Sheets
In this section, we’ll walk you through creating and saving a new spreadsheet. Then we’ll take you through renaming, copying, exporting, and printing a spreadsheet. Finally, we’ll show you how to access spreadsheet templates. Before you can do any of the steps listed below, you’ll need to sign-in to your Google account.
How to Create and Save a New Google Spreadsheet
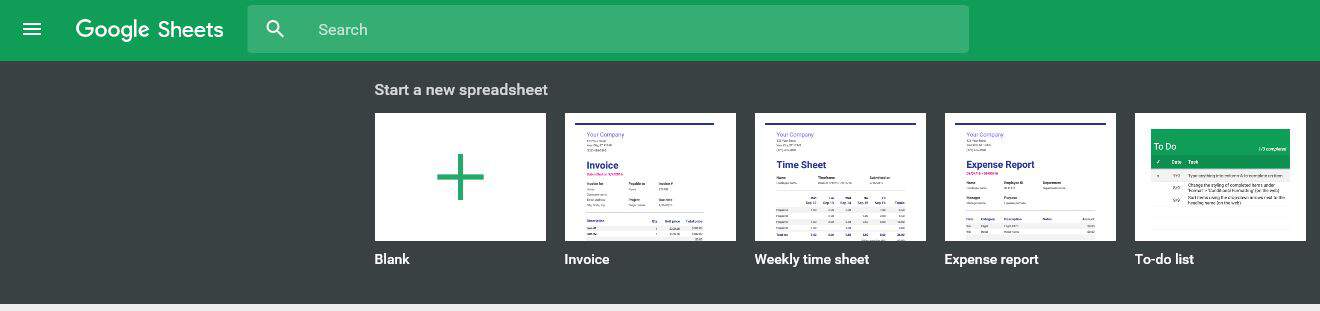
1. Open Google Sheets.
2. Click Blank under Start a new spreadsheet at the top of the page.
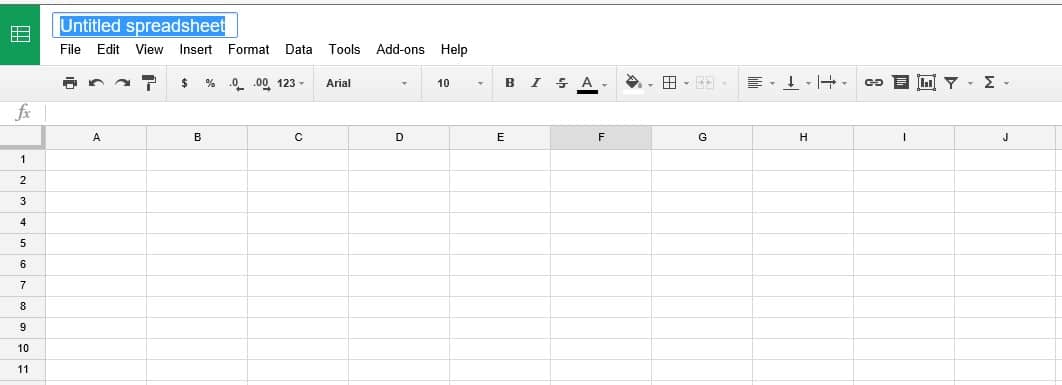
Your spreadsheet will appear in a new browser tab. To name and save your new spreadsheet:
1. Click Untitled spreadsheet at the top of the page. Note: If you don’t see this immediately, click the two down arrows located the top right corner of the screen.
2. Type in the name of the new spreadsheet in the field provided.
3. Click any cell in the spreadsheet to auto-save it with its name. The spreadsheet will be saved to your Google Drive.
How to Rename a Spreadsheet
1. Open Google Sheets or locate the file you wish to rename in your Google Drive. Click to open it.
2. Click the name of the spreadsheet at the top of the open sheet.
3. Type in the new name of the spreadsheet in the field provided.
4. Click any cell in the spreadsheet to auto-save it.
Tip: Alternatively, once you locate the file you want to rename, right-click on the name and click Rename. Next, type in the new name and click OK.
How to Export a Google Spreadsheet
1. In Google Sheets or Google Drive, click to open the spreadsheet you wish to export.
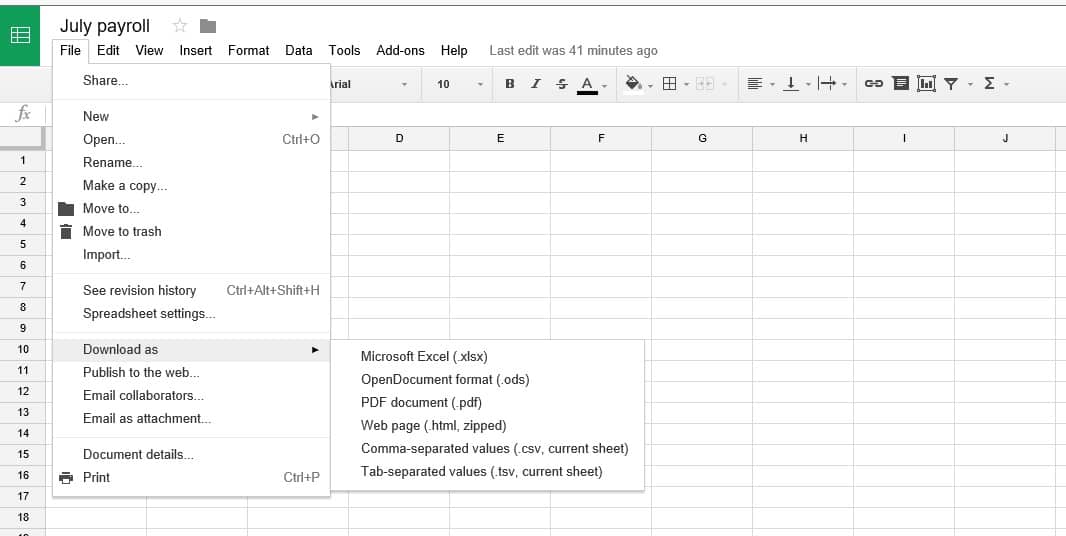
2. Below the name of the spreadsheet file at the top of the page, click File.
3. Select Download as from the dropdown menu and click the file format (.xlsx, .odf, .pdf, html/zipped, .csv, .tsv) you wish to export to.
4. The file will be downloaded to your computer in the format you selected. Depending on your computer setup, a dialog box may open across the bottom of your screen asking what you want to do with the file. Click the arrow next to Save and select the option you prefer.

How to Make a Copy of a Spreadsheet
1. Open the spreadsheet you wish to copy.
2. From the File menu, select Make a copy... from the dropdown menu.
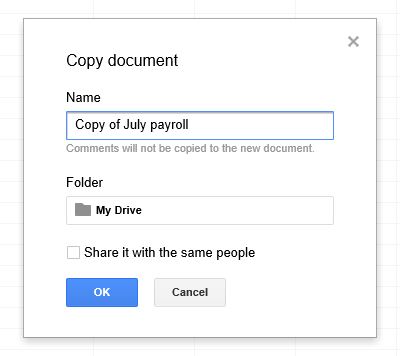
3. In the Copy document dialog box, rename the copied file, choose a Google Drive folder to save it in, and indicate your sharing preferences.
4. Click OK to save.
How to Print a Google Spreadsheet
1. Open the spreadsheet you wish to print.
2. From the File menu, select Print from the dropdown menu.
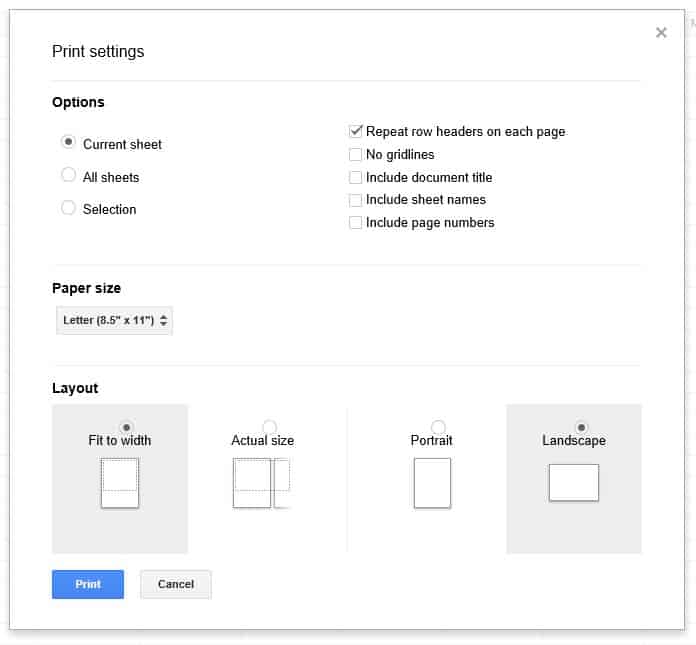
3. In the Print settings dialog box, select your printing preferences.
4. Click the blue Print button to print your spreadsheet(s).
Accessing Google Spreadsheet Templates
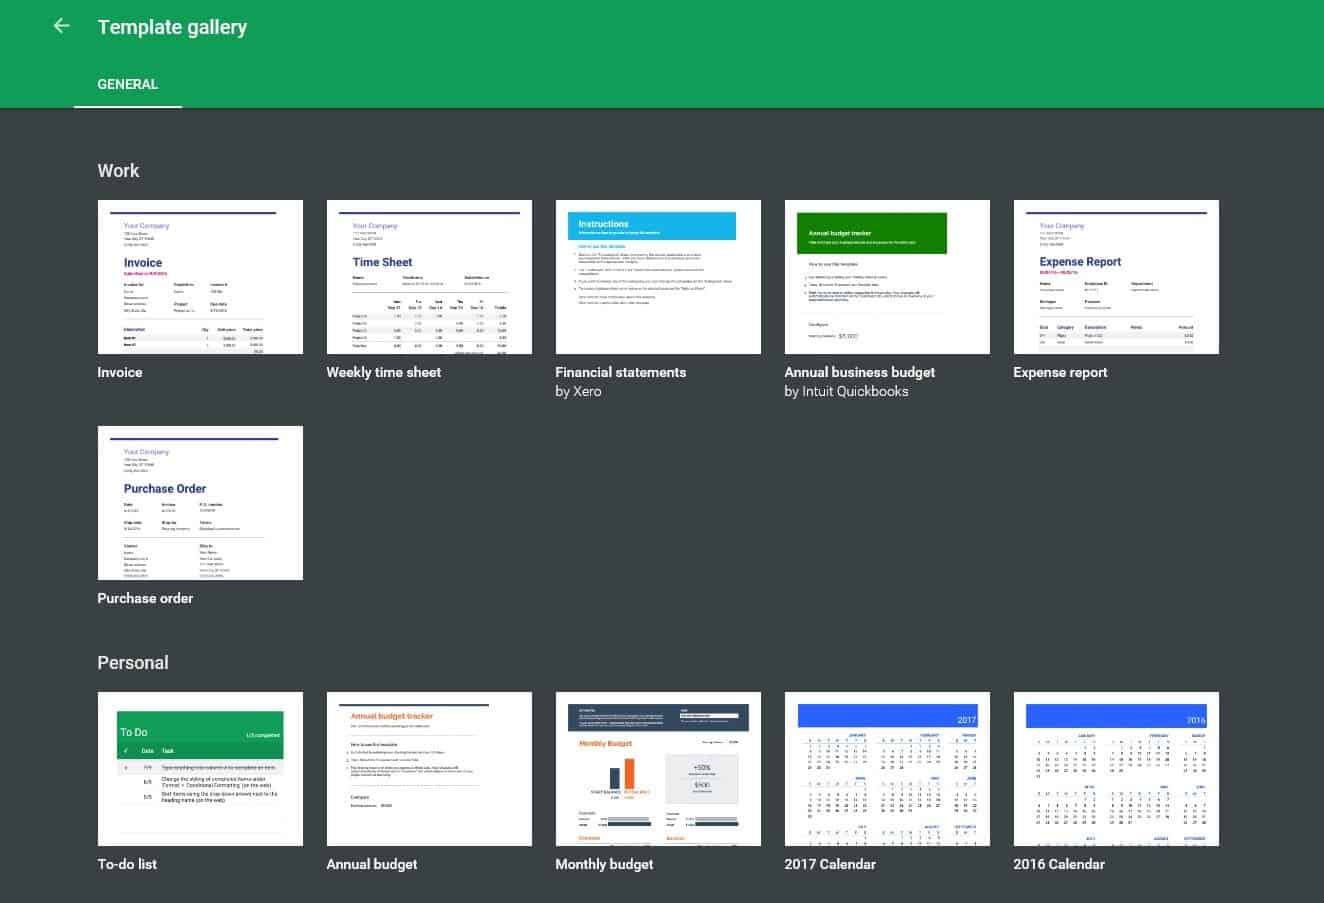
Google Sheets offers an excellent selection of templates to help you develop spreadsheets for any personal or business need. To access the Template Gallery:
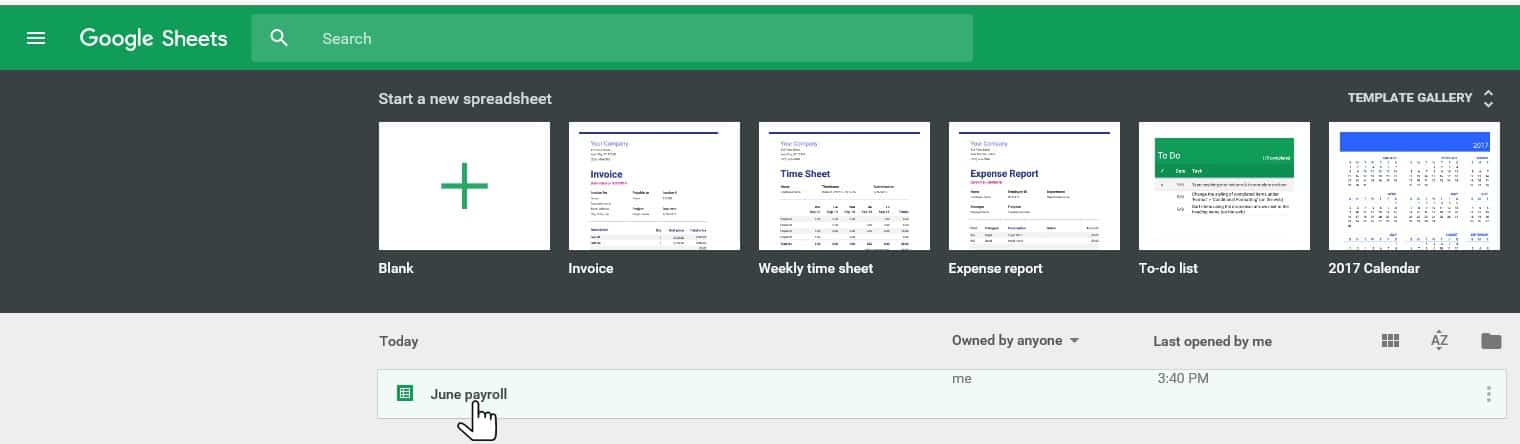
1. Open Google Sheets.
2. Click Template Gallery at the top right side of the page below the green search bar.
3. Click the template you wish to use. It will open in a new tab, and you can then rename and save the template.
Organizing Google Sheets
In this section, we’ll go over how to create and use Google Sheets folders, add documents and spreadsheets, share files and folders, and collaborate with other users.
How to Use Google Sheets Folders
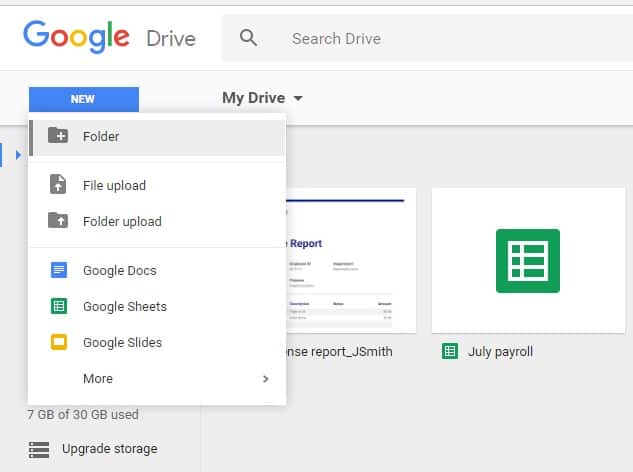
1. To create a folder in Google Sheets, sign in to your Google Drive and click the blue New button in the top left corner of the screen. Click Folder from the dropdown menu.
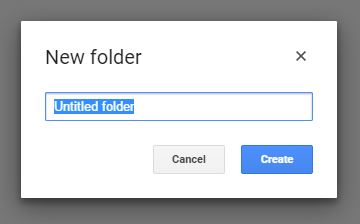
2. Name the folder in the space allotted in the New folder dialog box.
3. Click the blue Create button to save.
Adding Files to Google Drive Folders
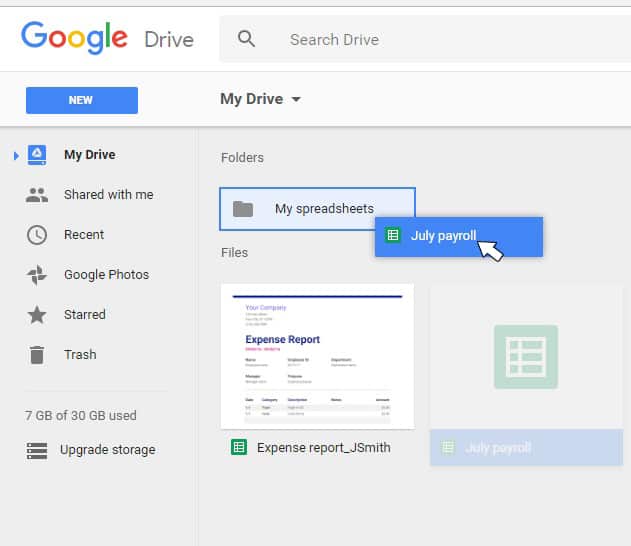
1. To add an existing spreadsheet file to a folder, click and drag the file to the preferred folder.
2. When the folder becomes highlighted, release the mouse button to add the file to the folder.
Sharing and Collaborating with Folders
1. To share a Google Drive folder with a collaborator, right-click on the folder.
2. Select Share from the dropdown menu.
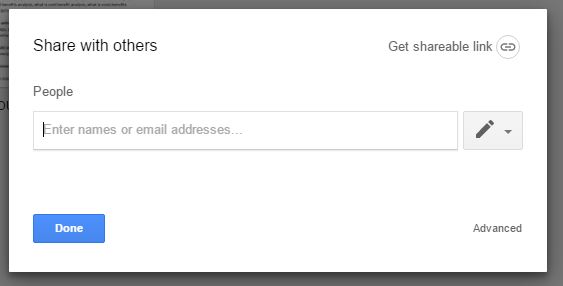
3. The Share with others dialog box appears. Type the name(s) of people already in your Gmail address book or email address(es) of the person(s) you want to share the folder with. You can add a note in the field provided, as well.
4. Click the blue Done button to share the folder.
5. To turn on Link Sharing and send links to documents and folders, click Get shareable link in the top right corner of the dialog box.
Google Spreadsheets 101
Now let’s look at the basics of working with spreadsheets. We’ll examine the following core tasks:
- Inserting, deleting, and moving rows and columns
- Editing and formatting cells
- Working with files
- Using data with spreadsheets
- Getting the most out of formulas and functions
Inserting and Removing Columns and Rows
Open a Google spreadsheet that you want to use.
To insert a column or row:
1. Click to select the row or column, or click and hold to highlight multiple areas.
2. Right-click anywhere on the highlighted area to launch the menu.
3. Click Insert.
To remove a row or column:
1. Click to select the row or column, or click and hold to highlight multiple areas.
2. Right-click anywhere on the highlighted area to launch the menu.
3. Select Delete column, or Delete row.

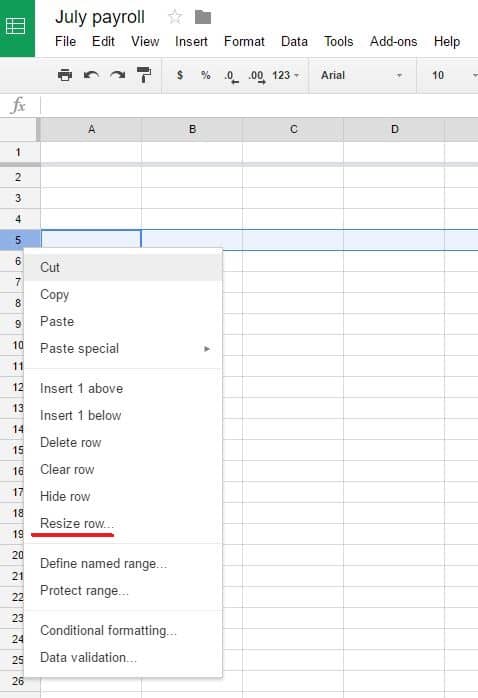
Resizing Columns and Rows
1. Click to select the row or column, or click and hold to highlight multiple areas that you want to resize.
2. Right-click the column letter or row number to launch the menu.
3. Select Resize column or Resize row. You can also click the row or column and grab-and-drag the border of a column or row to resize.
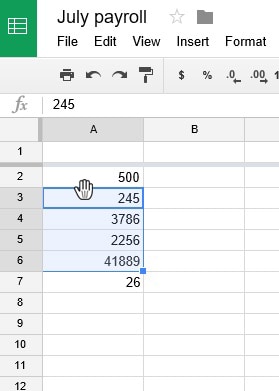
Relocating Cells, Columns and Rows
To relocate cells in a Google Spreadsheet:
1. Click on the cells you want to relocate to highlight them.
2. Place your cursor at the top of the cells to view the hand icon.
3. Using the hand icon, drag and drop the cells into their new location.
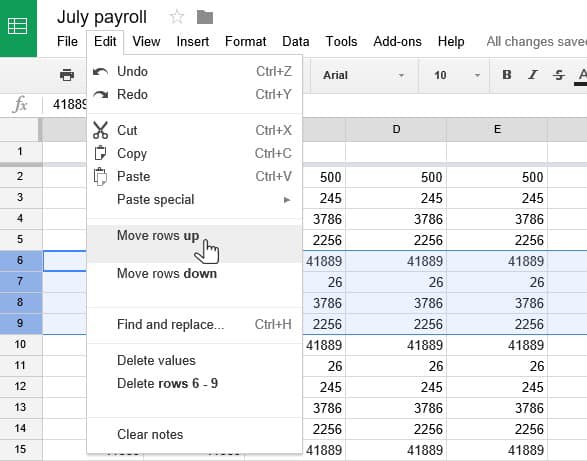
How to relocate columns and rows:
1. Click on the columns or rows you want to relocate to highlight them.
2. Click the Edit menu at the top of the sheet.
3. Click Move columns left or Move columns right to move the columns. If you’re relocating rows, click Move rows up or Move rows down from the Edit dropdown menu. You can also drag-and-drop the selection to move them to their new location.
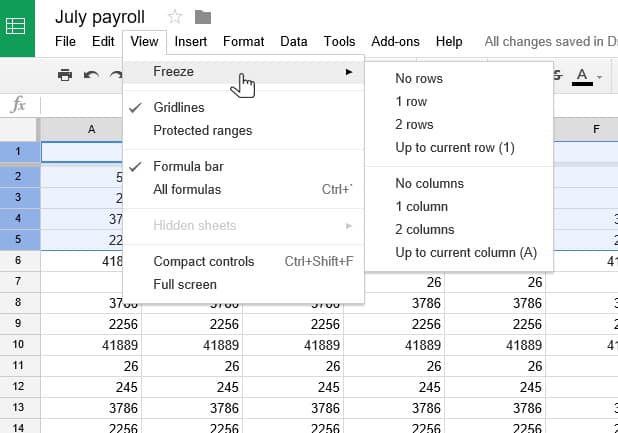
How to Freeze and Unfreeze Columns and Rows
Freezing panes, rows, or columns allows you to view those cells while you scroll and tab around within a worksheet.
To freeze a column or row:
1. Click the cells you want to freeze to highlight them.
2. Click the View menu at the top of the sheet.
3. Click Freeze.
4. Click the menu option for the column(s) or row(s) you want to freeze.
To unfreeze a column or row:
1. Click the cells you want to unfreeze to highlight them.
2. Click the View menu at the top of the sheet.
3. Click Freeze.
4. Choose No columns or No rows.
How to Edit and Format Cells in Google Sheets
It’s easy to edit content in a Google Sheets cell and format the display to fit your needs. Once you have copy in a cell, you can edit format, font, size, highlights, and more by highlighting the copy and clicking the relevant option from the toolbar along the top of the Sheets page.
To edit cells:
1. To add content to an empty cell, click to select the cell and begin typing.
2. To edit content already in a cell, double-click the cell to add, change, or remove information. The content in a selected cell also appears in the blank row between the toolbar and lettered rows, so you can also click into that field to edit content.
To format cells:
1. Click to select the cell, or click and drag your cursor to select multiple cells.
2. Click the Format menu and click the formatting option you want. You can also click a formatting option in the toolbar located at the top of the spreadsheet.
Tip: Hover over each formatting option with your cursor to reveal its function.

Keyboard Shortcuts
Keyboard shortcuts make your work faster and easier. Access the most up-to-date online list of the keyboard shortcuts for Google Sheets using the following steps:
- For Windows and Chrome OS: Press ‘Ctrl /’
- For Mac OS: Press ‘⌘ /’
How to Use Data in Google Sheets
Sorting and filtering columns and cells in a spreadsheet enables you to get the most value from your data.
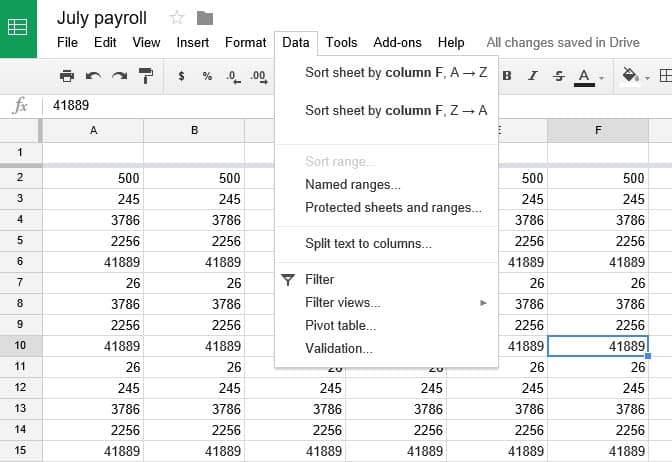
To sort by column:
1. Choose a column to sort, and click a cell within that column to select it.
2. Click Data at the top of the spreadsheet to expose menu options.
3. Click your preference from the sorting options displayed in the dropdown menu.
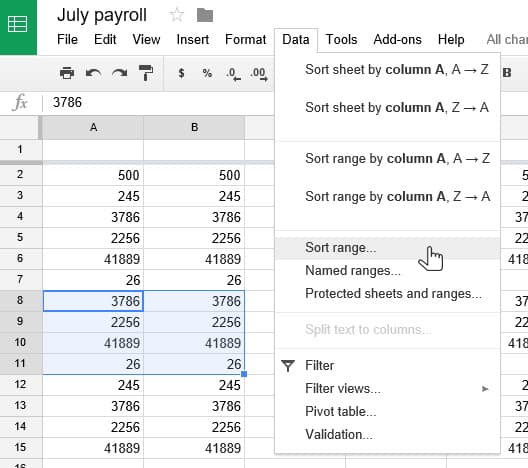
To sort by range:
1. Click-and-drag your cursor over a range of cells to select them.
2. Click Data at the top of the spreadsheet to expose menu options.
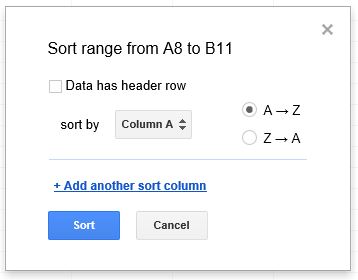
3. Click Sort range...
4. Click the gray Sort by button to select the column you wish to sort by.
5. Choose whether to sort in ascending (A-Z) or descending (Z-A) order and click that option.
6. Click the blue Sort button to complete the process.
Tip: When sorting, first freeze your header row to exclude it from the sort.
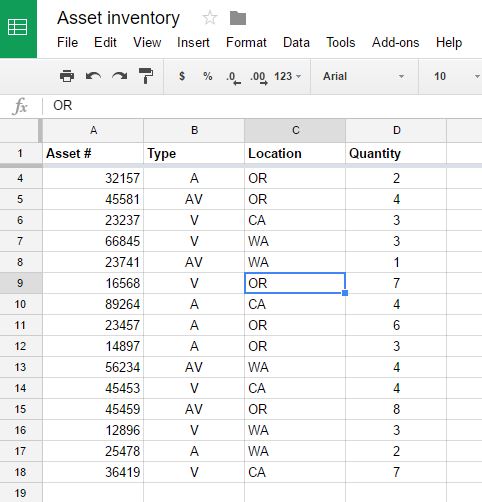
To create a filter:
Click any cell containing data.
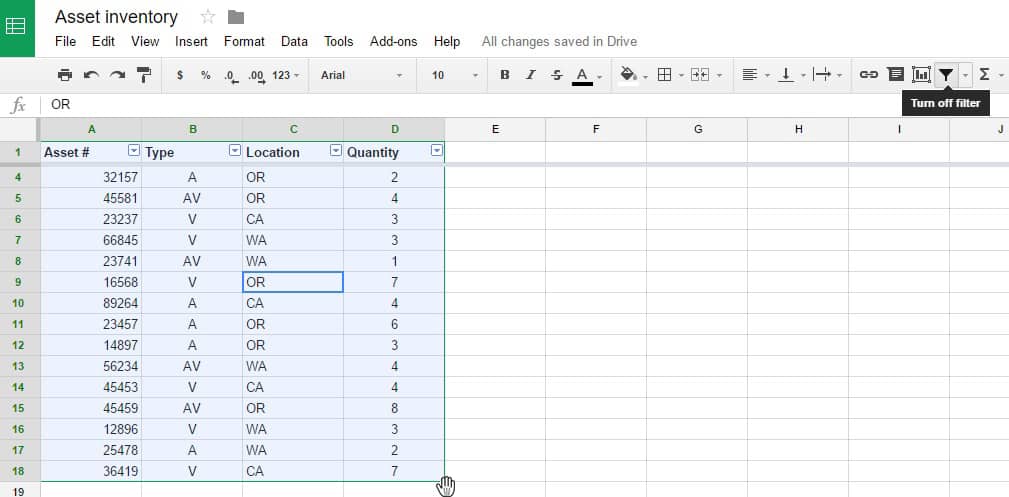
Click the Filter icon in the toolbar.
Note: If you don’t see the filter icon, click the More button at right end of the toolbar in Sheets.
From the column header, click the down arrow to choose filter criteria.
Click the blue OK button to display filtered data.
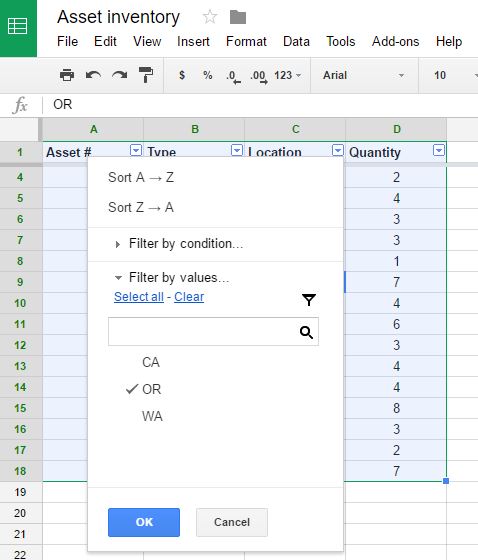
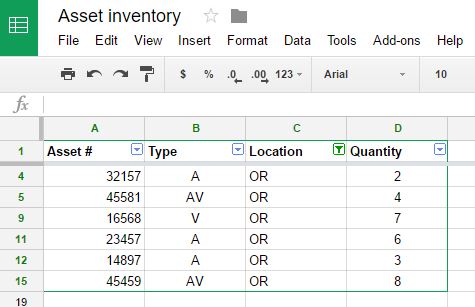
To narrow your results further, try using more than one filter. Click additional columns with the filter icon selected. Then, click the down arrow on other column headers to choose additional filter criteria, and click the blue OK button.
To clear a filter, simply unclick the ‘Filter’ button.
Tip: When filtering, first freeze your header row to exclude it from the filter.
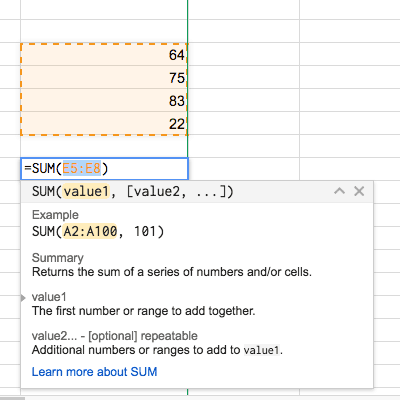
How to Use Functions to Create Formulas
To use functions to create spreadsheet formulas, type = in an empty spreadsheet cell, along with the function you wish to use (see a comprehensive list of functions here), and then select the cells that will be used in the formulas. See the function help box, which will be visible as you edit, to understand definitions, view examples, and get more information as you work.
How to Use the Google Sheets Mobile App
The Google Sheets mobile app makes it easy to access your spreadsheet files at any time, from any location, using your smartphone or tablet—even while offline. Download the Google Sheets Mobile app from the App Store (iOS) or Google Play (Android). Once the app is installed on your device and you’ve signed into your Google account, you can get started.
How to Open and Use a Spreadsheet File in the Mobile App
Note: These instructions are for iOS devices.
1. Launch the Google Sheets app.
2. Tap a spreadsheet file to open it.
3. Tap the line or cell to select and modify.
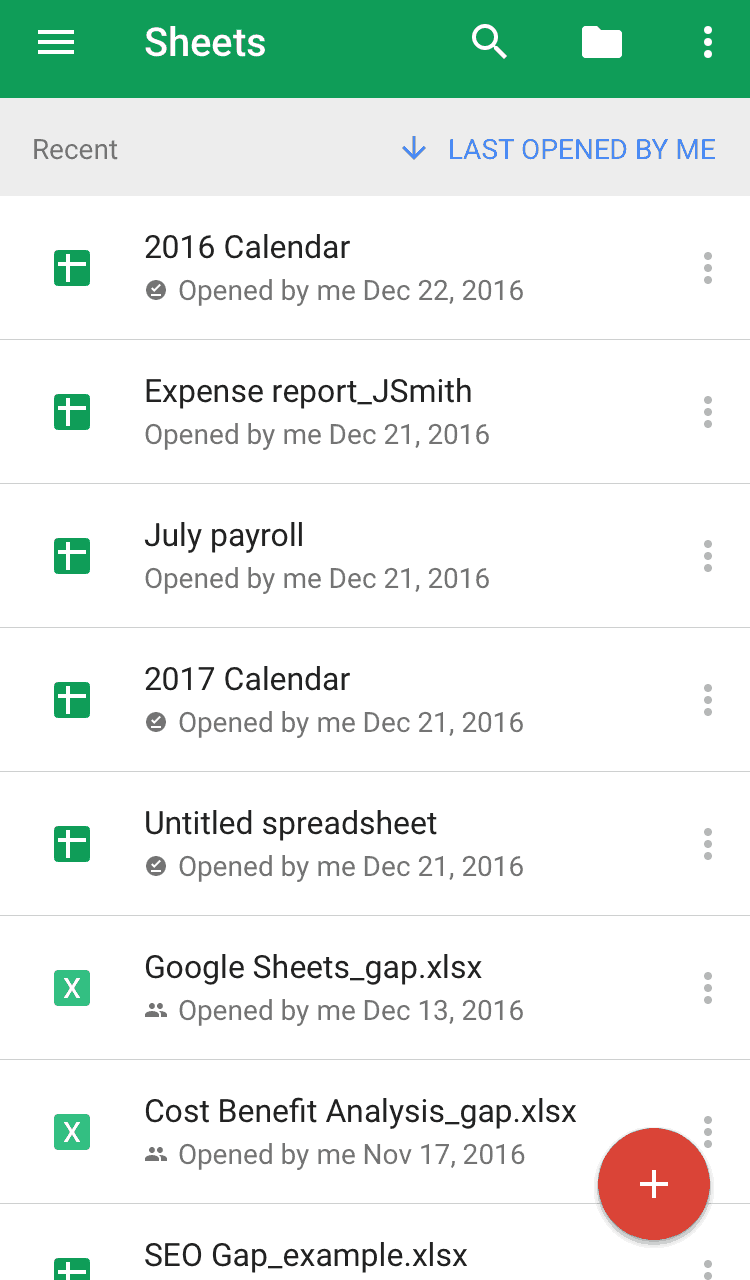
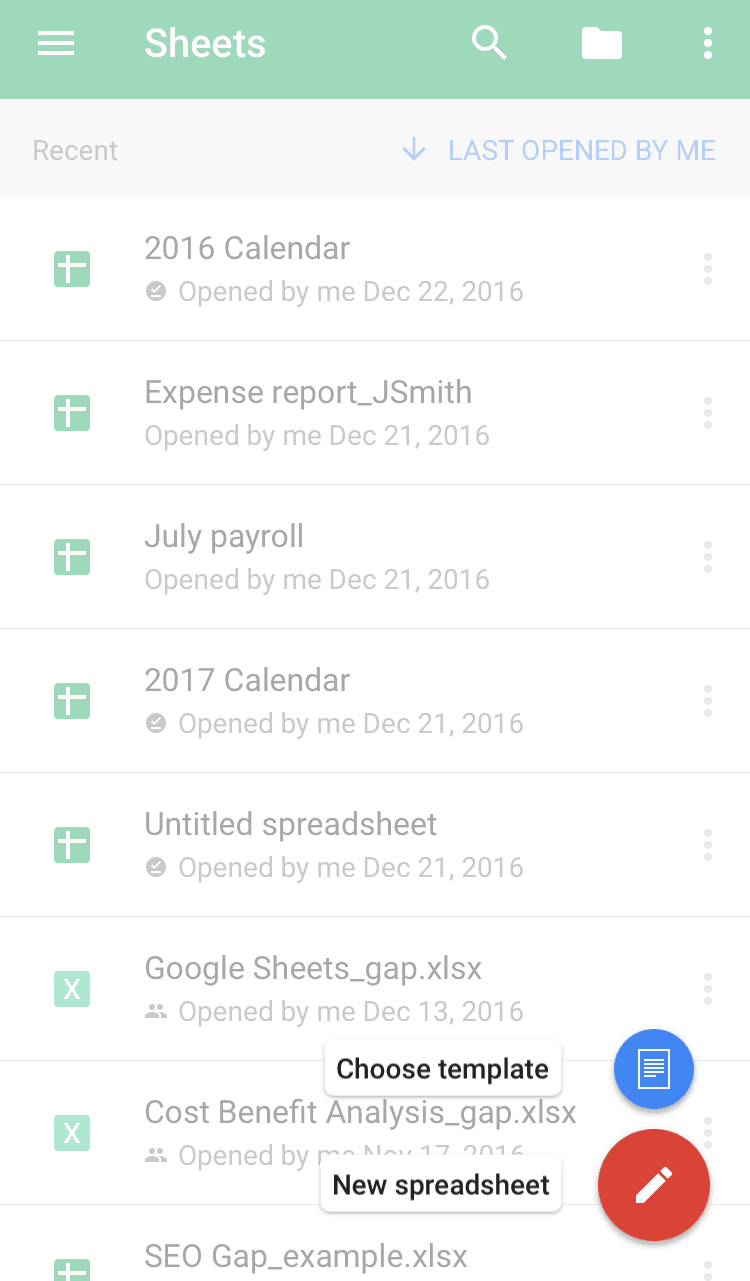
Create a New Spreadsheet File
1. Tap the orange circle with the + in the lower right corner.
2. Tap New spreadsheet or Choose template.
- To select a template, tap on the template you want.
- To create a new spreadsheet, name your spreadsheet in the dialog box, and click Create.
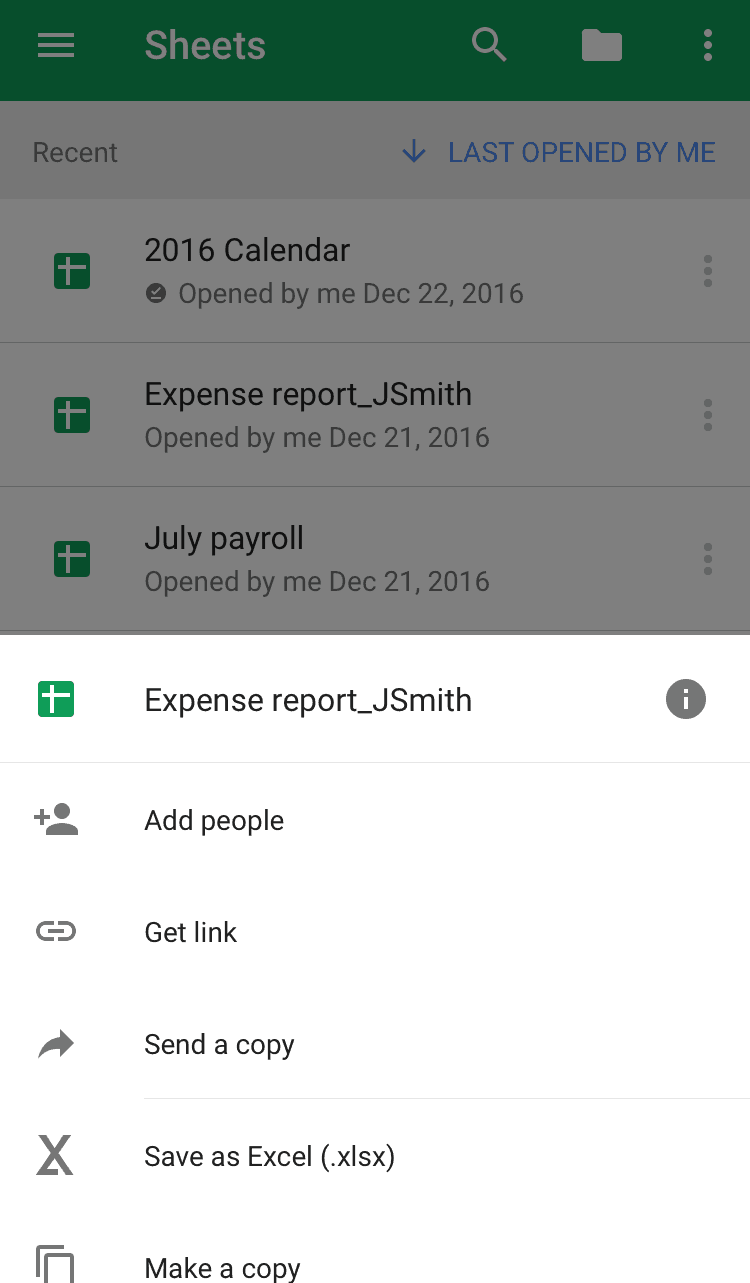
Changing a Spreadsheet File
1. From your list of files, tap the three dots to the right of the file name.
2. From the pop-up menu, tap the action you wish to take:
- Add people
- Get link
- Send a copy
- Save as Excel
- Make a copy
- Move
- Make available offline
- Star the file
- Rename the file
- Remove (delete) the file
3. Swipe the menu down to hide it and return to the file.
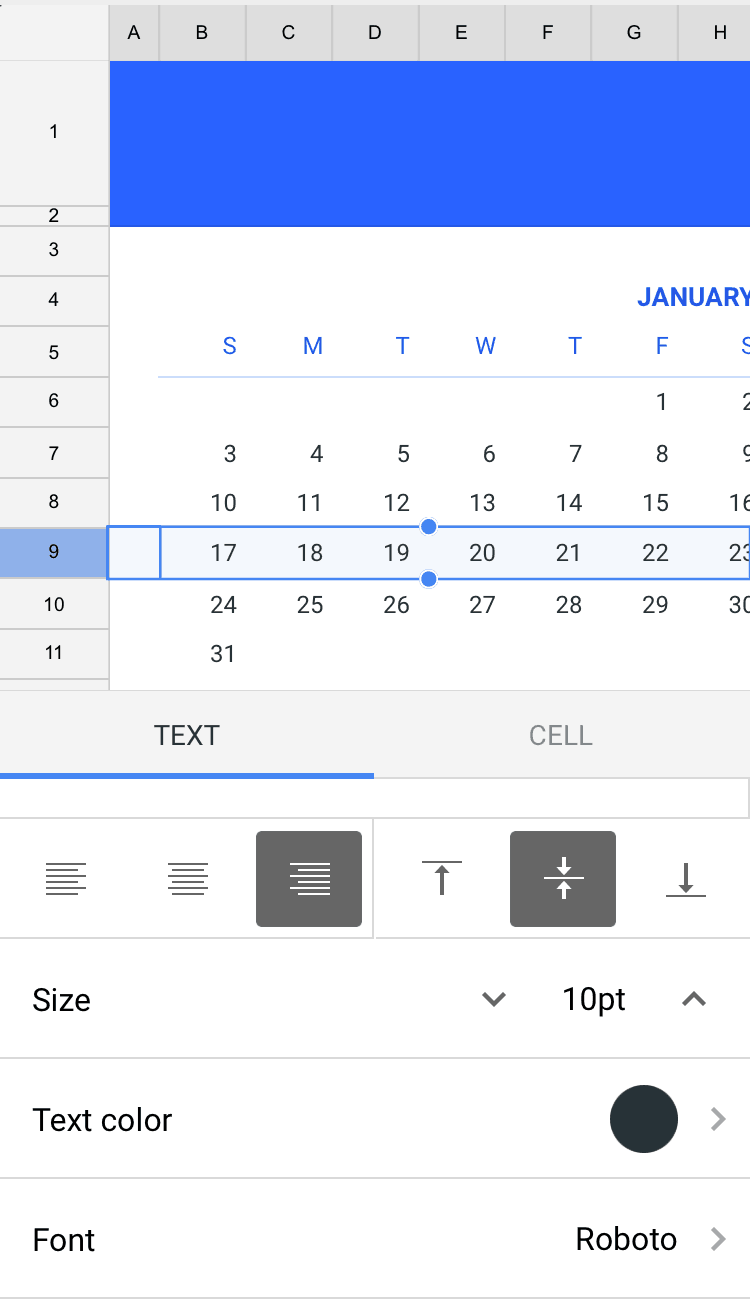
Formatting Text
1. Tap the cell you want to format to select it, and drag the blue borders to adjust the selection.
2. Tap the Format icon.
3. Tap to choose whether you want to format text, or a cell.
4. Tap the preferred formatting option.
5. Swipe the format menu down, or simply tap the spreadsheet to return to the file.
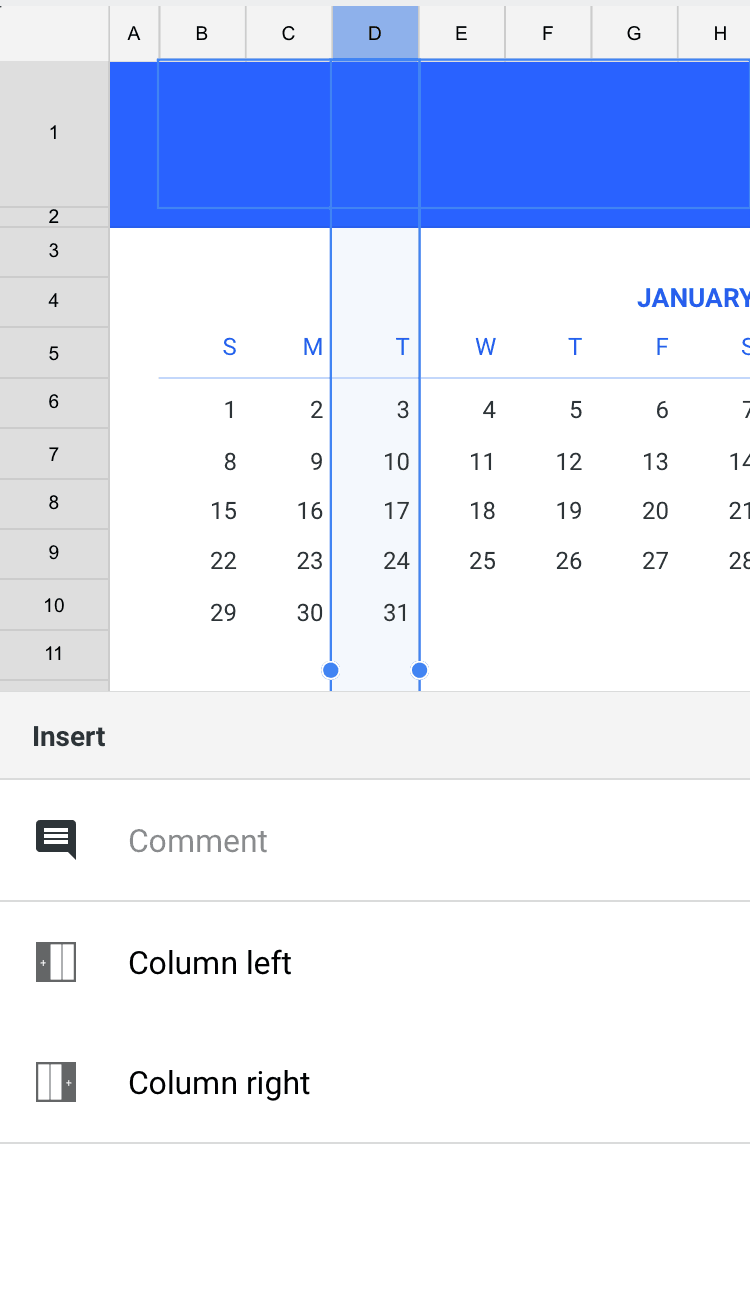
Inserting and Deleting Rows and Columns
1. Touch the cell next to the column or row where you want to insert or delete new columns or rows.
- To insert: Tap the + in the top right corner, and tap the spot where you want to insert the new row or column.
- To delete: From the menu, tap > and select Delete column or Delete row.
Freeze Panes, and Hide/Unhide Rows and Columns
Freezing panes, rows, or columns, allows you to view those cells while you scroll and tab within a worksheet.
1. Touch the arrow next to the name on the tab at the bottom of the sheet to expand the menu.
2. Use the up and down arrows located to the right of Freeze rows or Freeze columns to add or remove the number of cells to freeze.
3. Swipe the menu down, or simply tap the spreadsheet to return to the file.

Hiding and unhiding rows and columns lets you customize your view of the spreadsheet cells, which can be particularly useful on a mobile screen.
1. To hide a row or column, tap to open the spreadsheet file.
2. Tap the header of the row or column you want to hide to select it, and then tap again to open the menu.
3. Tap the right arrow to navigate to Hide column or Hide row (you may have to tap several times).
4. Tap to choose Hide column or Hide row.
5. Tap the spreadsheet to return to the file.

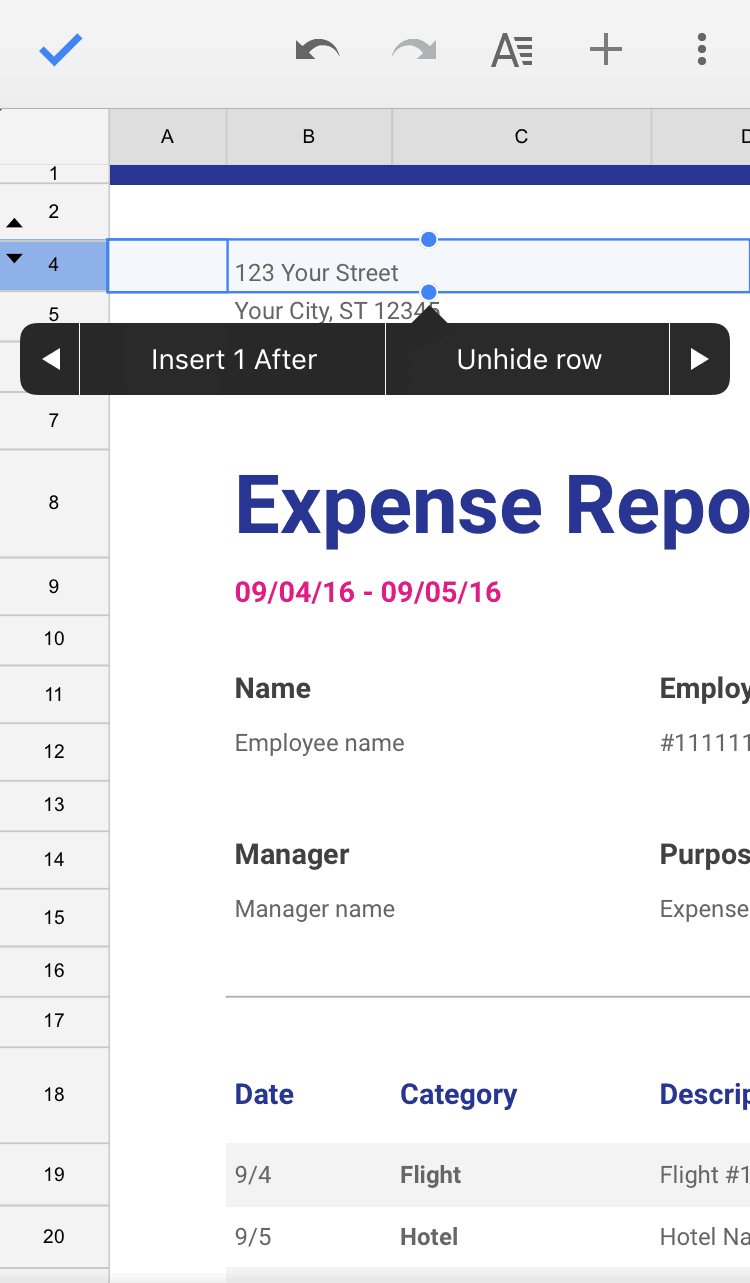
1. To unhide a row or column, tap to open the spreadsheet file.
2. Tap the header of the row or column next to the one you want to unhide, then tap again to open the menu.
3. Tap the right arrow to navigate to Unhide column or Unhide row (you may have to tap several times).
4. Tap to choose Unhide column or Unhide row.
5. Tap the spreadsheet to return to the file.
Tips and Tricks from a Google Sheets Expert
We asked Matthew Guay, co-author of The Ultimate Guide to Google Sheets, for some insider tips on using Google Sheets. His favorite little-known shortcut involves Google Forms, which was previously part of Google Sheets, but is now a standalone polling and data analysis app.
“Using Google Forms, you can create a form and have it save responses automatically to Google Sheets,” says Guay. “Google Sheets on its own is pretty powerful, with logic jumps, a tool to make self-grading quizzes, and collaboration tools to let others help you make a form. But when linked to your Google Sheets spreadsheet, it can email you a summary of the results every day.”
The Simplest Way to Learn from Data
According to Guay, another great tip is using the new ‘Explore’ tab in Google Sheets. “It's the simplest way to ‘learn’ from your data,” he says. “Fill your spreadsheet with data you want to analyze, and click the Explore button in the bottom right side of Sheets. It'll pull out quick facts from the data (largest and smallest values, etc.), make charts that seem to fit the data, and more. It's a super-cool new tool that's perhaps the best reason to use Sheets right now!”
Offline Editing
Another favorite of Guay’s is Offline Editing, which enables users to edit sheets when offline. “Just install the Sheets add-on in Google Chrome or use the mobile app, and set it to store your sheets offline, just like in Excel or other apps,” he says.
Language and Finance Functions

Working in multiple languages? No problem, says Guay, there are functions to make it easy. “Use =GOOGLETRANSLATE() functions to figure out which language text is in or translate it right inside sheets.”
Need to access current and historical finance data? “Use =GOOGLEFINANCE() to find data like currency exchange rates and stock prices,” says Guay. “These are super-handy, and part of the beauty of Google Sheets being online!”
Easily Import a Google Sheet into Smartsheet and Do More
Empower your people to go above and beyond with a flexible platform designed to match the needs of your team — and adapt as those needs change.
The Smartsheet platform makes it easy to plan, capture, manage, and report on work from anywhere, helping your team be more effective and get more done. Report on key metrics and get real-time visibility into work as it happens with roll-up reports, dashboards, and automated workflows built to keep your team connected and informed.
When teams have clarity into the work getting done, there’s no telling how much more they can accomplish in the same amount of time. Try Smartsheet for free, today.