Microsoft Excel Basics
Before we get started, it’s useful to know some essential Excel terminology that you’ll see in this article.
The Ribbon holds the standard menu tabs (File, Home, Insert, Page Layout, Formulas, Data, Review, View, Automate, Help) within the spreadsheet. Double-check that you are under the proper Ribbon tab for each step.

Pro Tip: Hover the mouse over any buttons in the Ribbon menu tabs to highlight the name and confirm you are selecting the correct button.
The Formula Bar corresponds to the selected cell. When creating schedules, you can enter and edit text directly into the Formula Bar or the highlighted cell.

Add and move between sheets by clicking on the tabs at the bottom of the page.

Video: How to Use an Excel Weekly Schedule Template

How to Create a Weekly Schedule in Excel
The easiest way to create a weekly schedule in Excel is to use a pre-built template. These templates often include features such as auto-filled date ranges, customizable time frames, and automatic time and date formatting.
Follow this step-by-step tutorial to learn how to use a weekly schedule template for Excel. In addition, this guide will teach you how to customize your schedule by highlighting important events and changing colors. Along the way, you’ll also find time-saving tips and tricks.
Download a Schedule Template for Excel
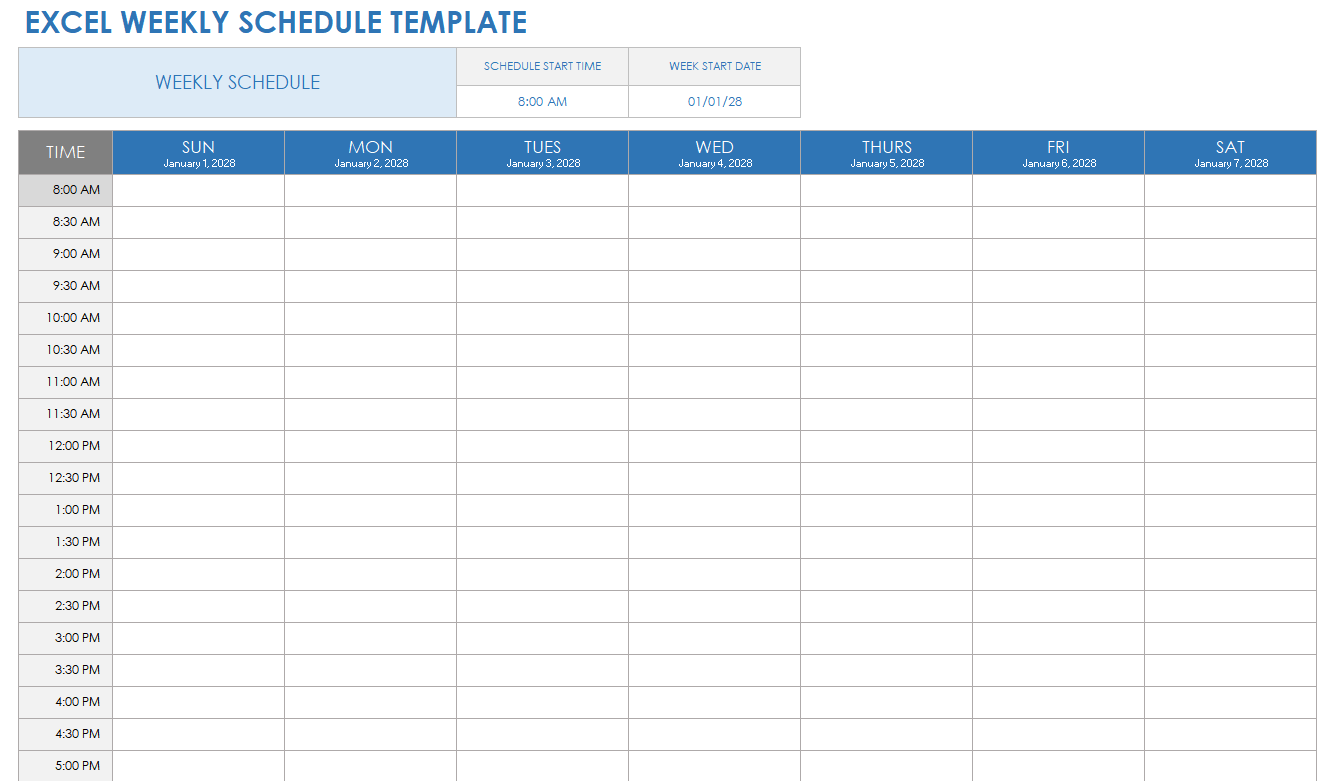
The first thing you will need to do is download a schedule template for Excel . This template generates a date range automatically. You can customize the start time for the schedule each day. This template is free to download, easy to use and customize, and a great way to get started. For more options, check out our collection of schedule templates for Excel.
1. Prepare the Document
- After you download the template, open it. It will automatically open in Excel.
- If the Protected View banner appears at the top of the spreadsheet, click Enable Editing. This will allow you to make changes and add information to the template.

2. Enter the Date and Time Ranges
- At the top of the template, click on the cell below Schedule Start Time and enter the time you would like the schedule to begin in the HH:MM format. The template will automatically populate the schedule with times by the half hour, starting from the time you enter.
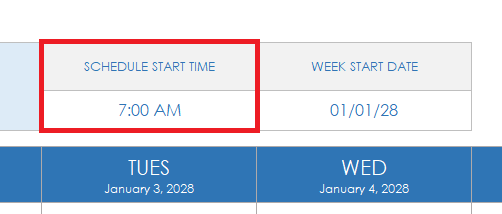
- Pro Tip: To change the Schedule Start Time to PM, just type “PM” after the time you enter.
- Click on the cell below Week Start Date and enter the date of the Sunday that begins the week in the MM/DD/YY format. The template will automatically populate the dates of each weekday within the schedule.

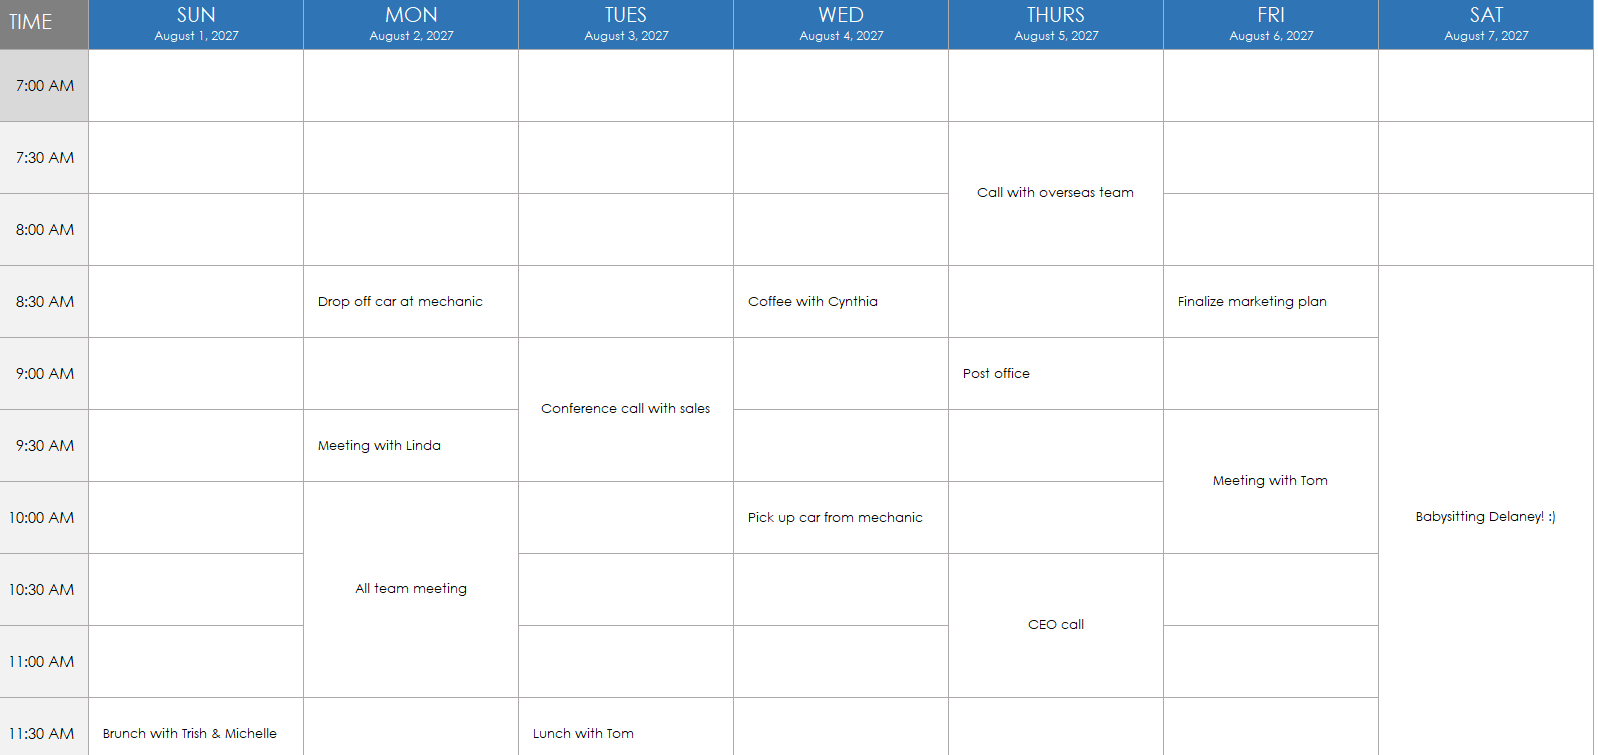
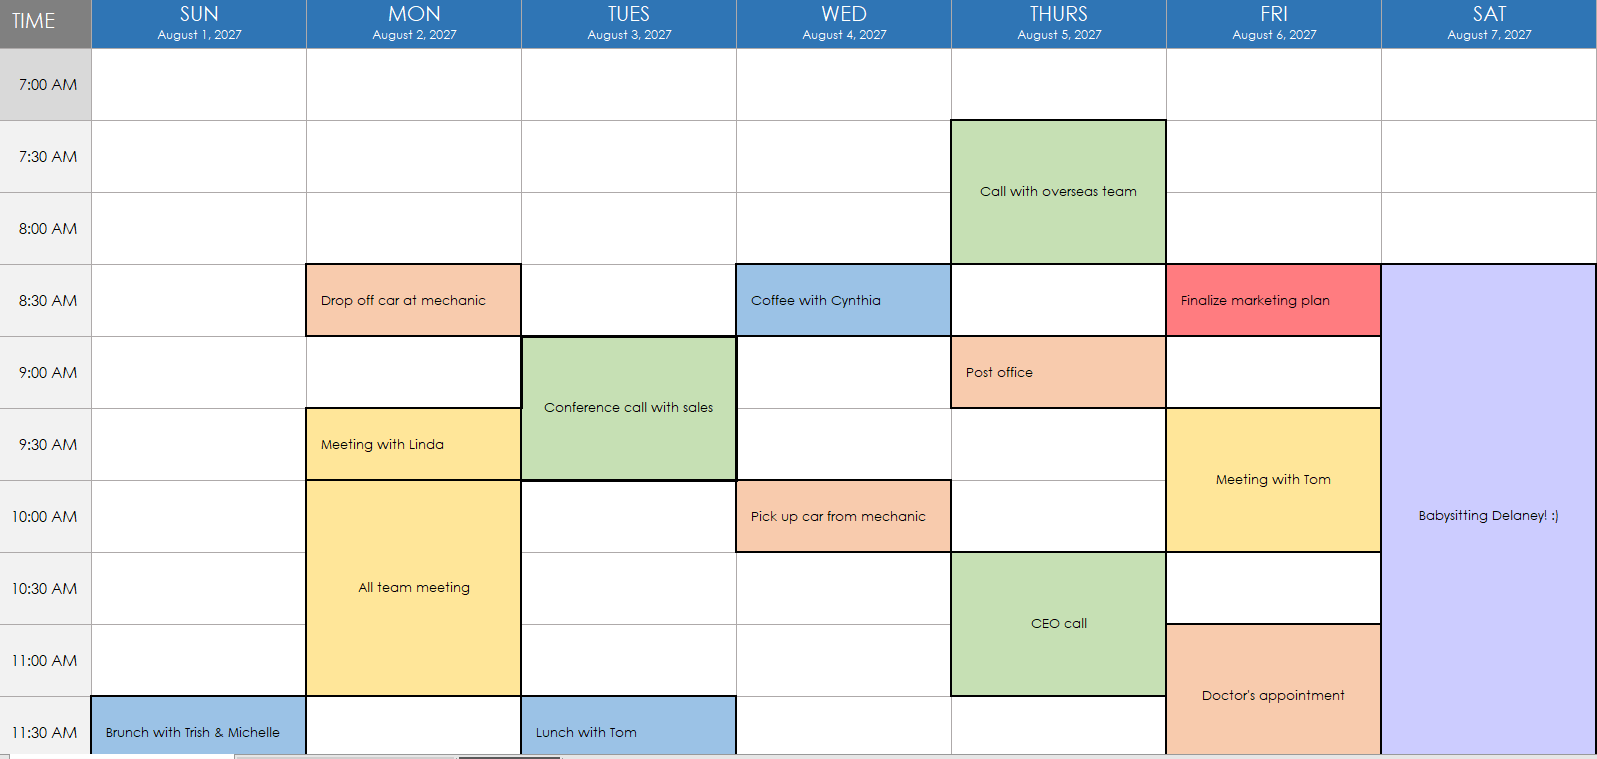
3. Add Scheduled Events
- Within the schedule, locate the first time slot of your first scheduled activity. Click on that cell and enter the details of your scheduled activity.
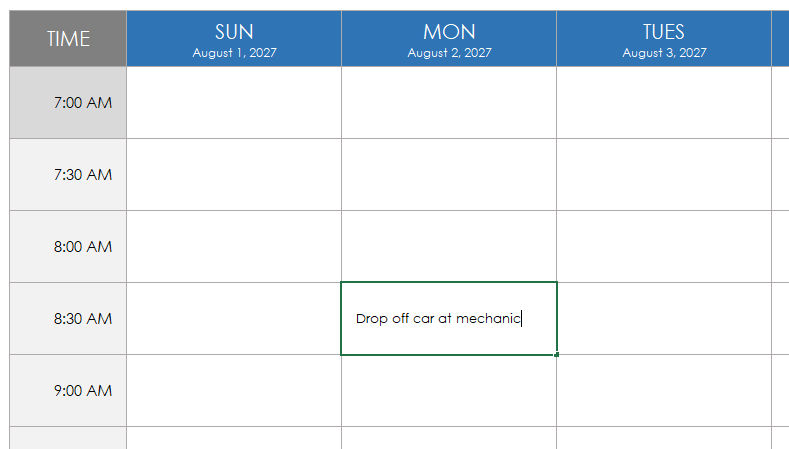
- Repeat this process for all scheduled activities for each weekday.
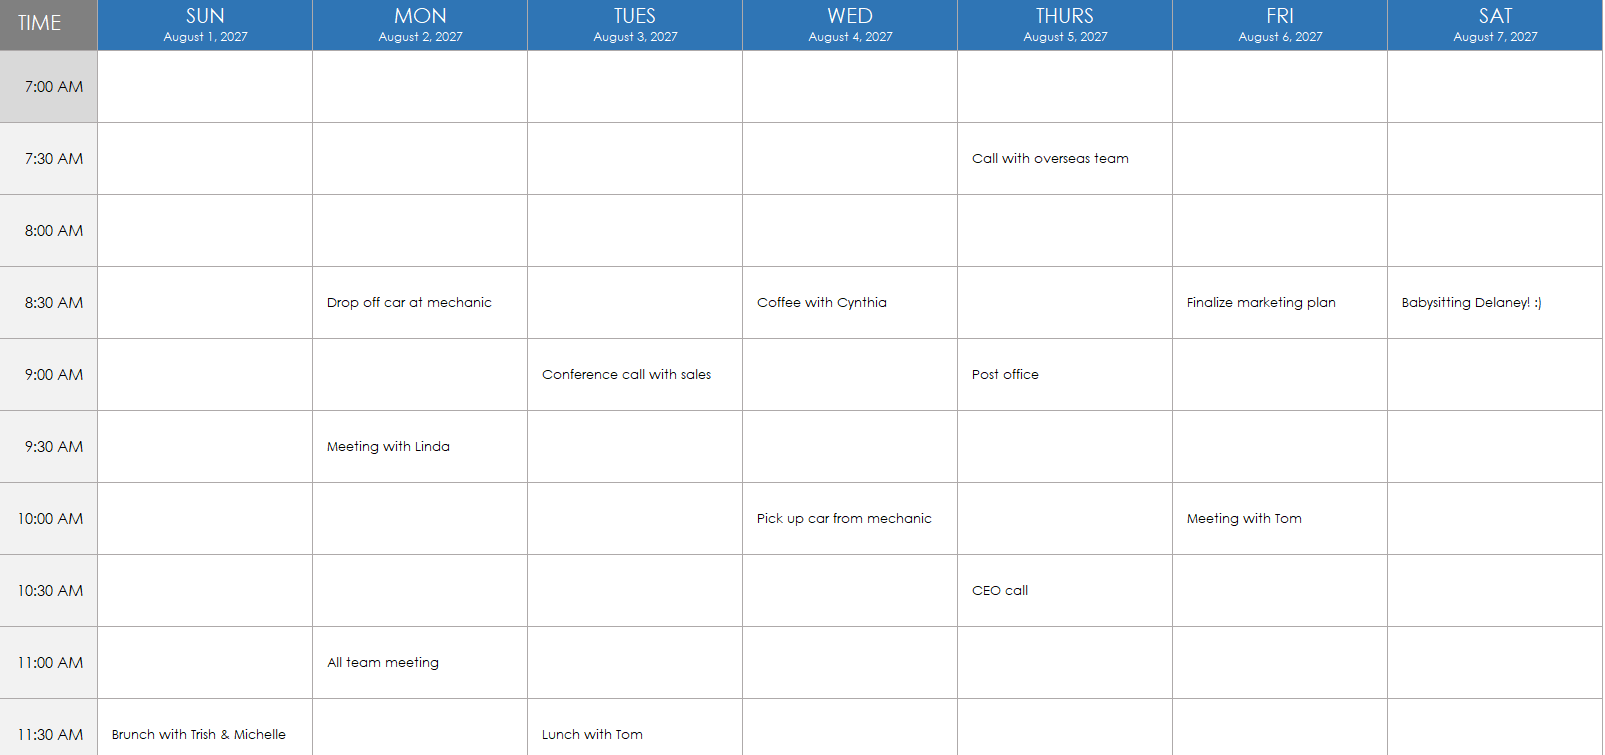
Pro Tip: For scheduled events that last longer than 30 minutes, click within the starting time cell, and click the green square in the lower-right corner and drag to the ending cell. Next, click the Merge & Center button to combine the cells. You can also find this option by clicking the drop-down menu for Cell Styles in the Quick Access Toolbar.
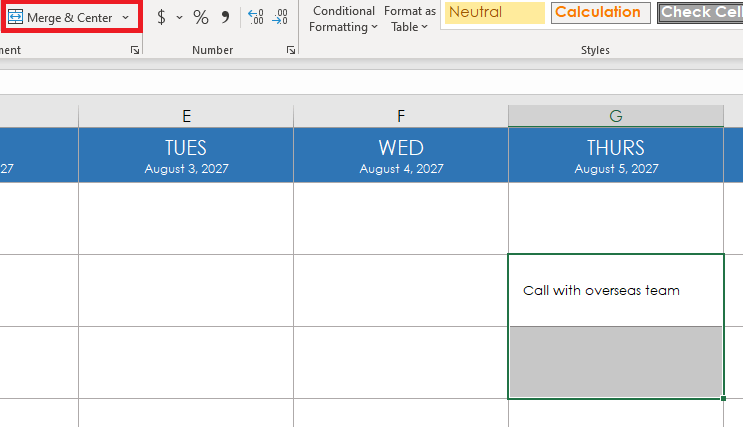
- This will create longer, combined cells to represent longer periods of time.
- Pro Tip: To duplicate schedule entries, click on the cell you want to duplicate. Then, press Ctrl + C to copy that entry. Next, click on the cell you would like to contain the duplicate entry, and press Ctrl + V to paste it.
- When you have completed your schedule, be sure to save your work. Excel does not automatically save changes. Select File > Save or use the following shortcut keys:
Mac: Command + S
PC: Ctrl + S
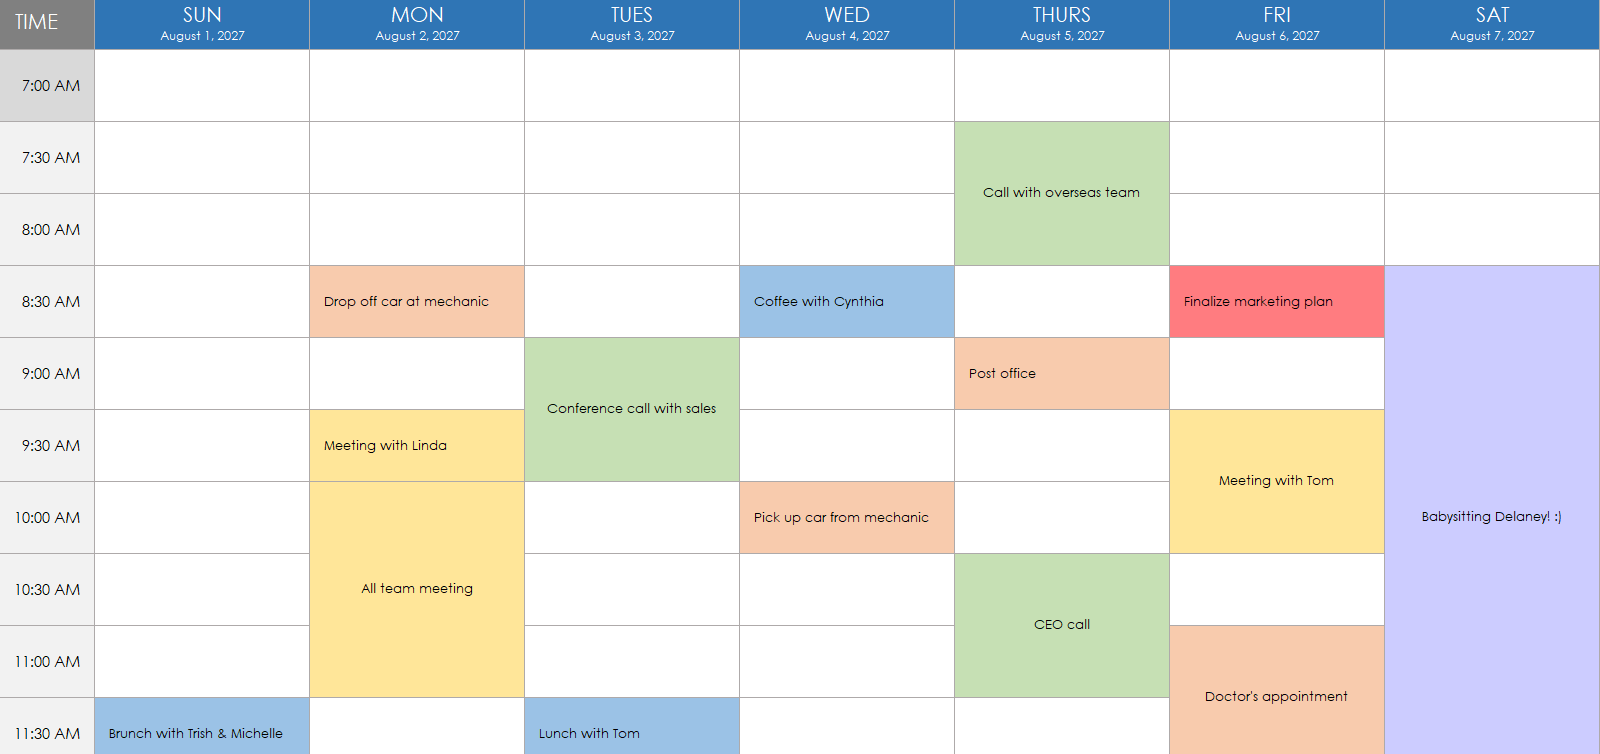
How to Customize Your Weekly Schedule
Adding colors and thicker borders can make your schedule easier to read and more personalized. We’ll walk you through how to customize your weekly schedule in the sections below.
How to Add Thicker Borders to Events
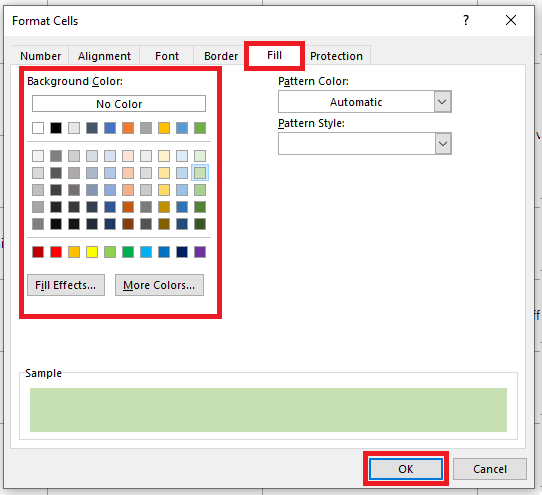
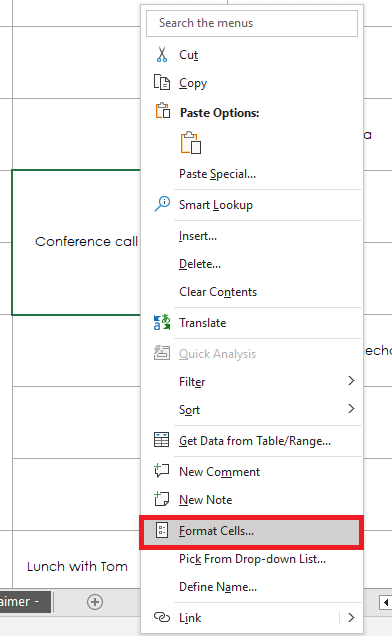
- Right-click on the cell you would like to highlight with a thicker border, then click Format Cells in the drop-down menu.
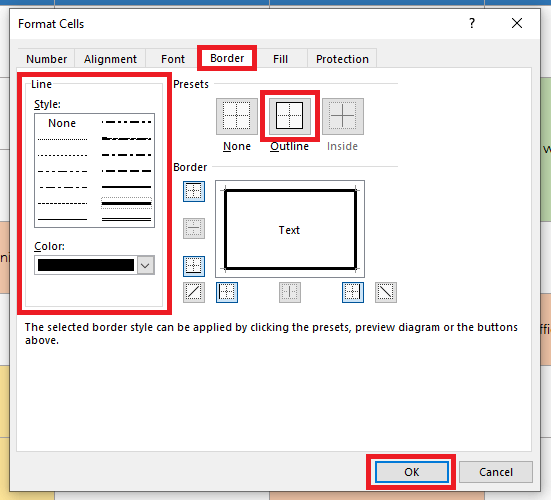
- In the Format Cells window, click the Border tab. Choose a Line Style and Line Color in the menu on the left, then click Outline in the Presets menu. When you are done, click the OK button.
- Repeat this process for all cells where you want to add a border.
- Pro Tip: To select multiple cells, hold the Ctrl key (Shift + Option keys on a Mac), and click each cell where you would like to add a border. When all your cells are selected, right-click on any of them to bring up the menu with Format Cells. Any changes you make here will apply to all of the selected cells.
Build Schedules More Easily With Smartsheet
Timeline view in Smartsheet empowers users to plan, visualize, and collaborate on date-based work in real-time, enabling you to effortlessly organize tasks, track progress, and communicate status.
In just a few clicks, launch your project’s timeline on any sheet to visualize your work, understand the details, and adjust information, making it easy to track project progress, detect blockers, and communicate statuses.
Discover how timeline view in Smartsheet can help your team visualize date-based work and achieve greater efficiency and transparency across projects.
Learn more about timeline view in Smartsheet.