How to Build a Profit and Loss Statement in Microsoft Excel
Our tutorial breaks down the process of creating a profit and loss statement in Excel for small businesses into three easy steps, so you can get started using our customizable templates.
We’ve included instructions for customizing your template using basic Excel formulas. For additional resources and tutorials, see our guide to writing a general profit and loss statement.

Pam Prior, creator of Profit Concierge™, says that when creating a profit and loss statement (P&L) for a small business, “use categories that work for your business and make sense to you.” Our template helps you understand the basic income statement format, so you can tailor your profit and loss statements to meet the specific needs of your small business.
“The whole point of doing a profit and loss statement is seeing it in context,” says Prior. “You want to have a column for each month because then you can see the story of what happens over time, and that’s when the numbers become useful to you. The value of Excel is that you can input and see 12 months clearly in the columns. The only Excel you need to know is plus and minus.”
Once you learn how to create a report for a 1-month period using our template instructions below, you can easily compile reports and create a 12-month statement. By doing so, you will be able to see trends and create forecasts for your business. Plus, we’ve added instructions for customizing statements for your business in Excel.
View and download our complete range of free profit and loss templates to find the most suitable, fully customizable templates for your business. For more template options with a small business focus, see our free small business profit and loss statement templates.
Before getting started, make sure you have your credit card and bank account statements on hand. This tutorial uses a monthly reporting period, but you can apply these instructions to quarterly or annual reporting structures.
1. Download, Open, and Save the Excel Template
-
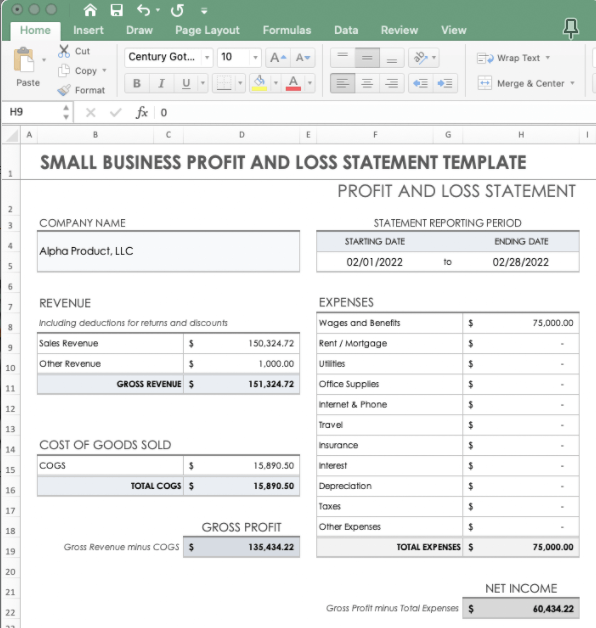
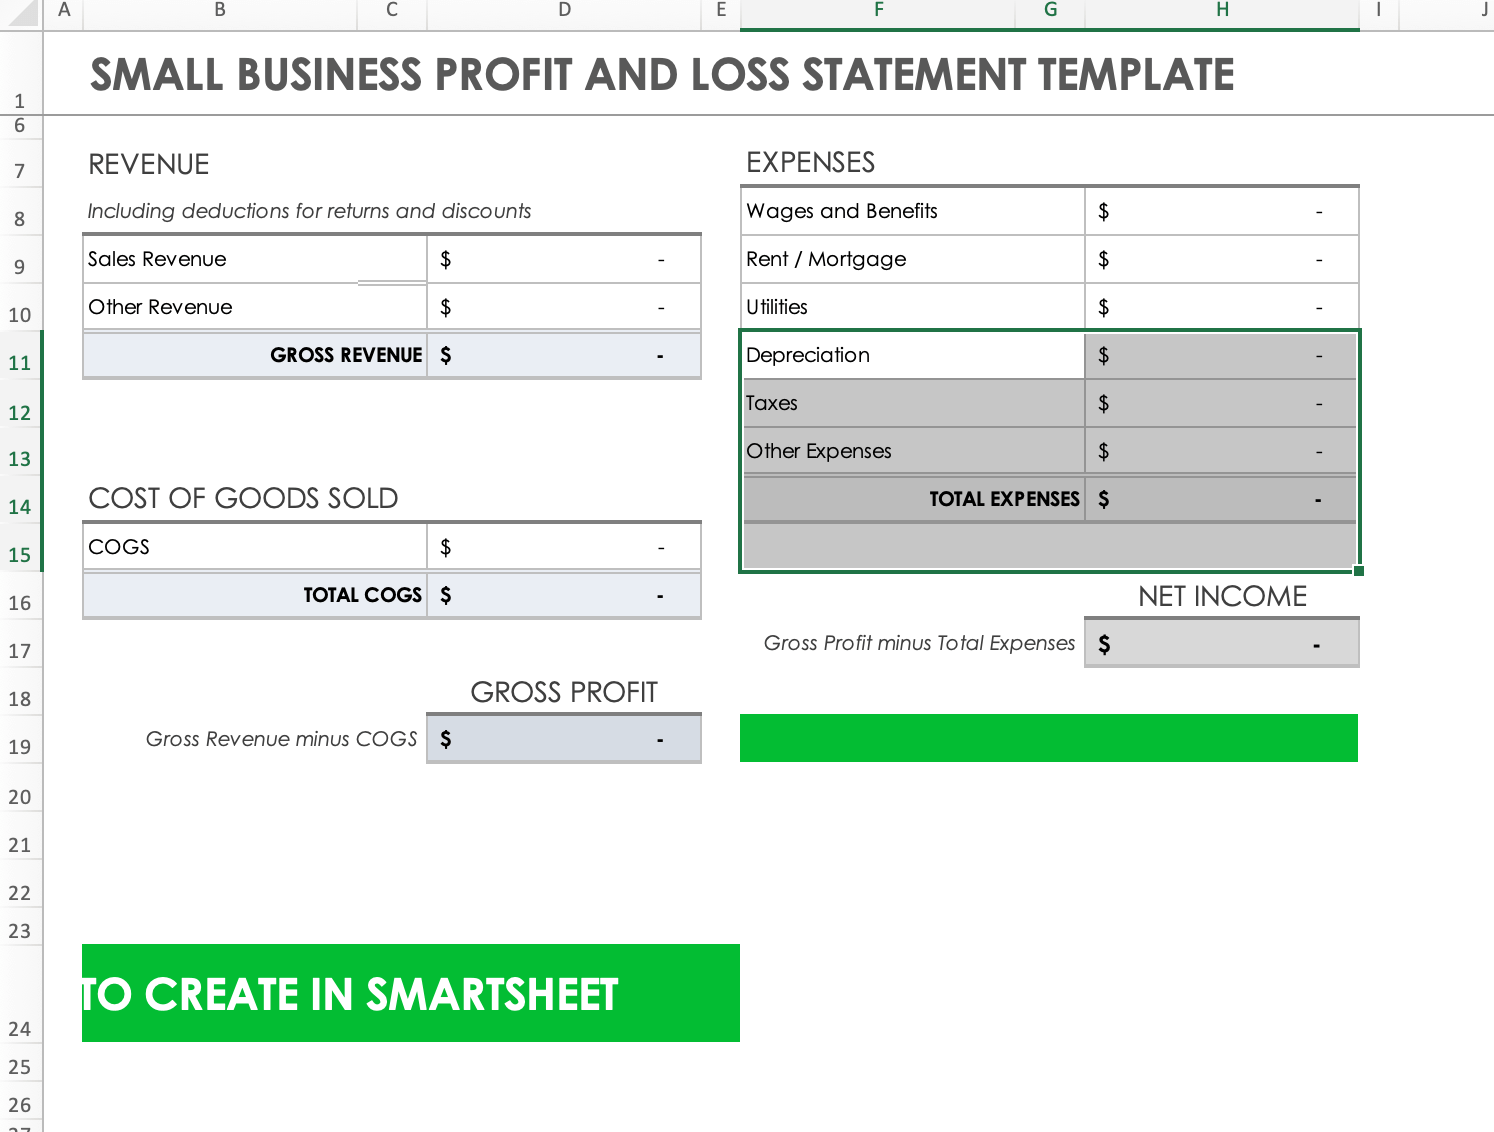
Download and open the free small business profit and loss statement template for Excel.
The template should automatically open in Excel.

- Select File from the menu bar and click Save As. Retitle the document in the overlay screen, select the preferred folder, and click Save.
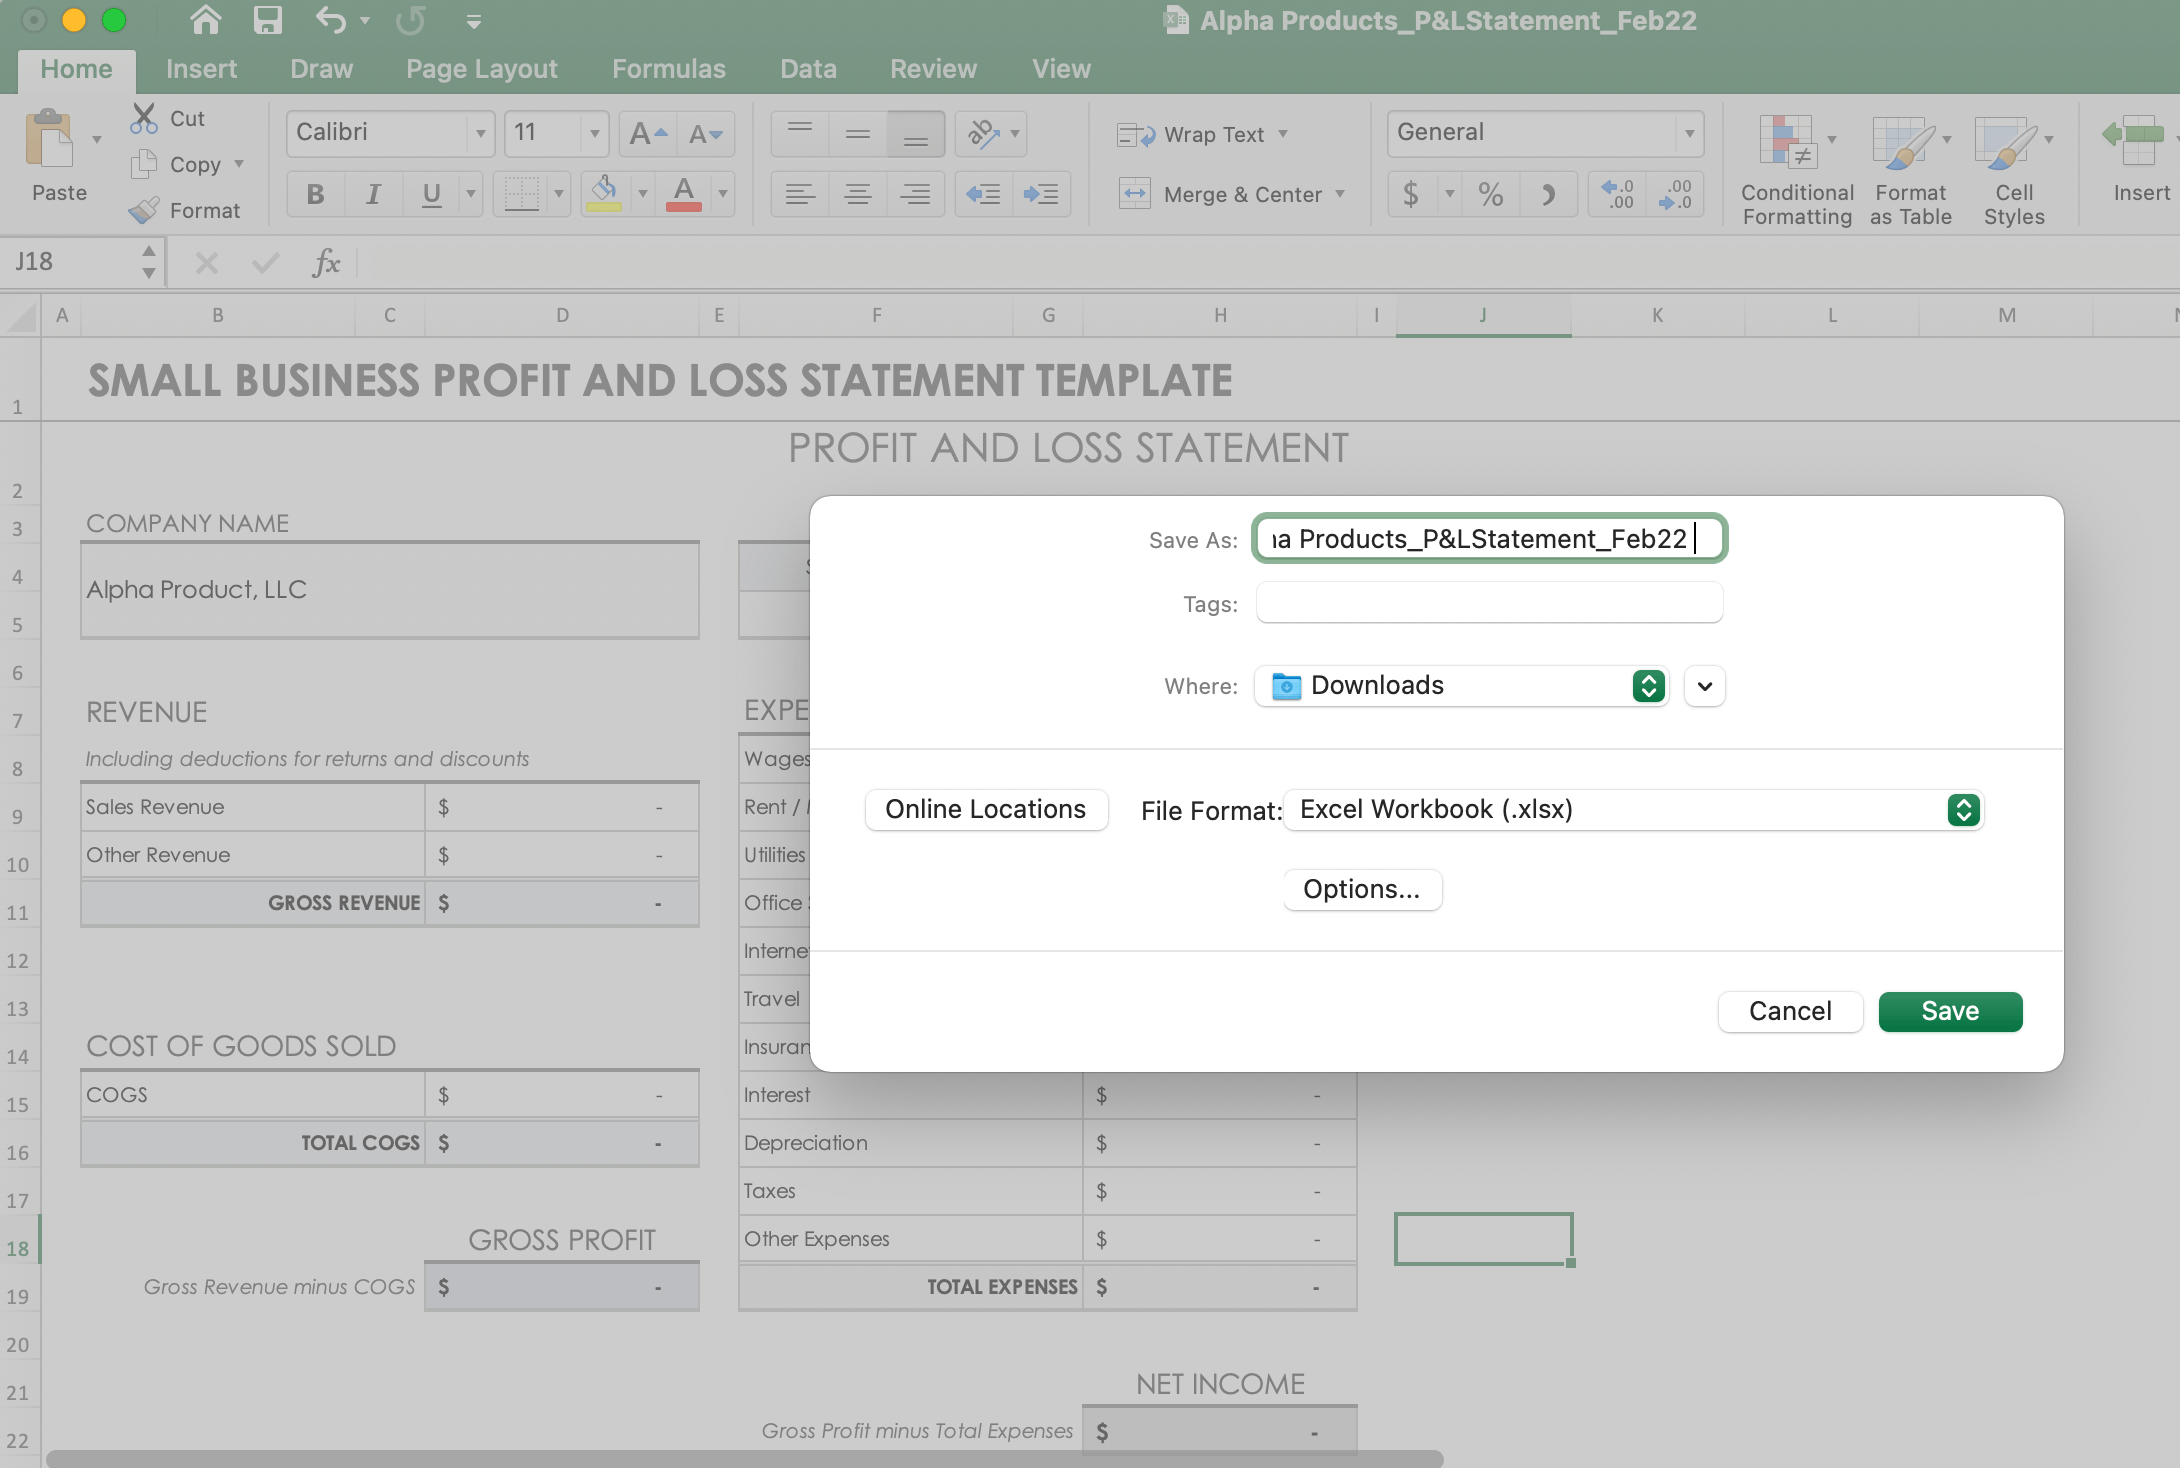
Pro Tip: Determine a consistent file naming system so that you can easily locate and retrieve any statement. Include the reporting end date in the title of your document. For example: Business Name_P&LStatement_Feb22
2. Input Your Company and Statement Dates
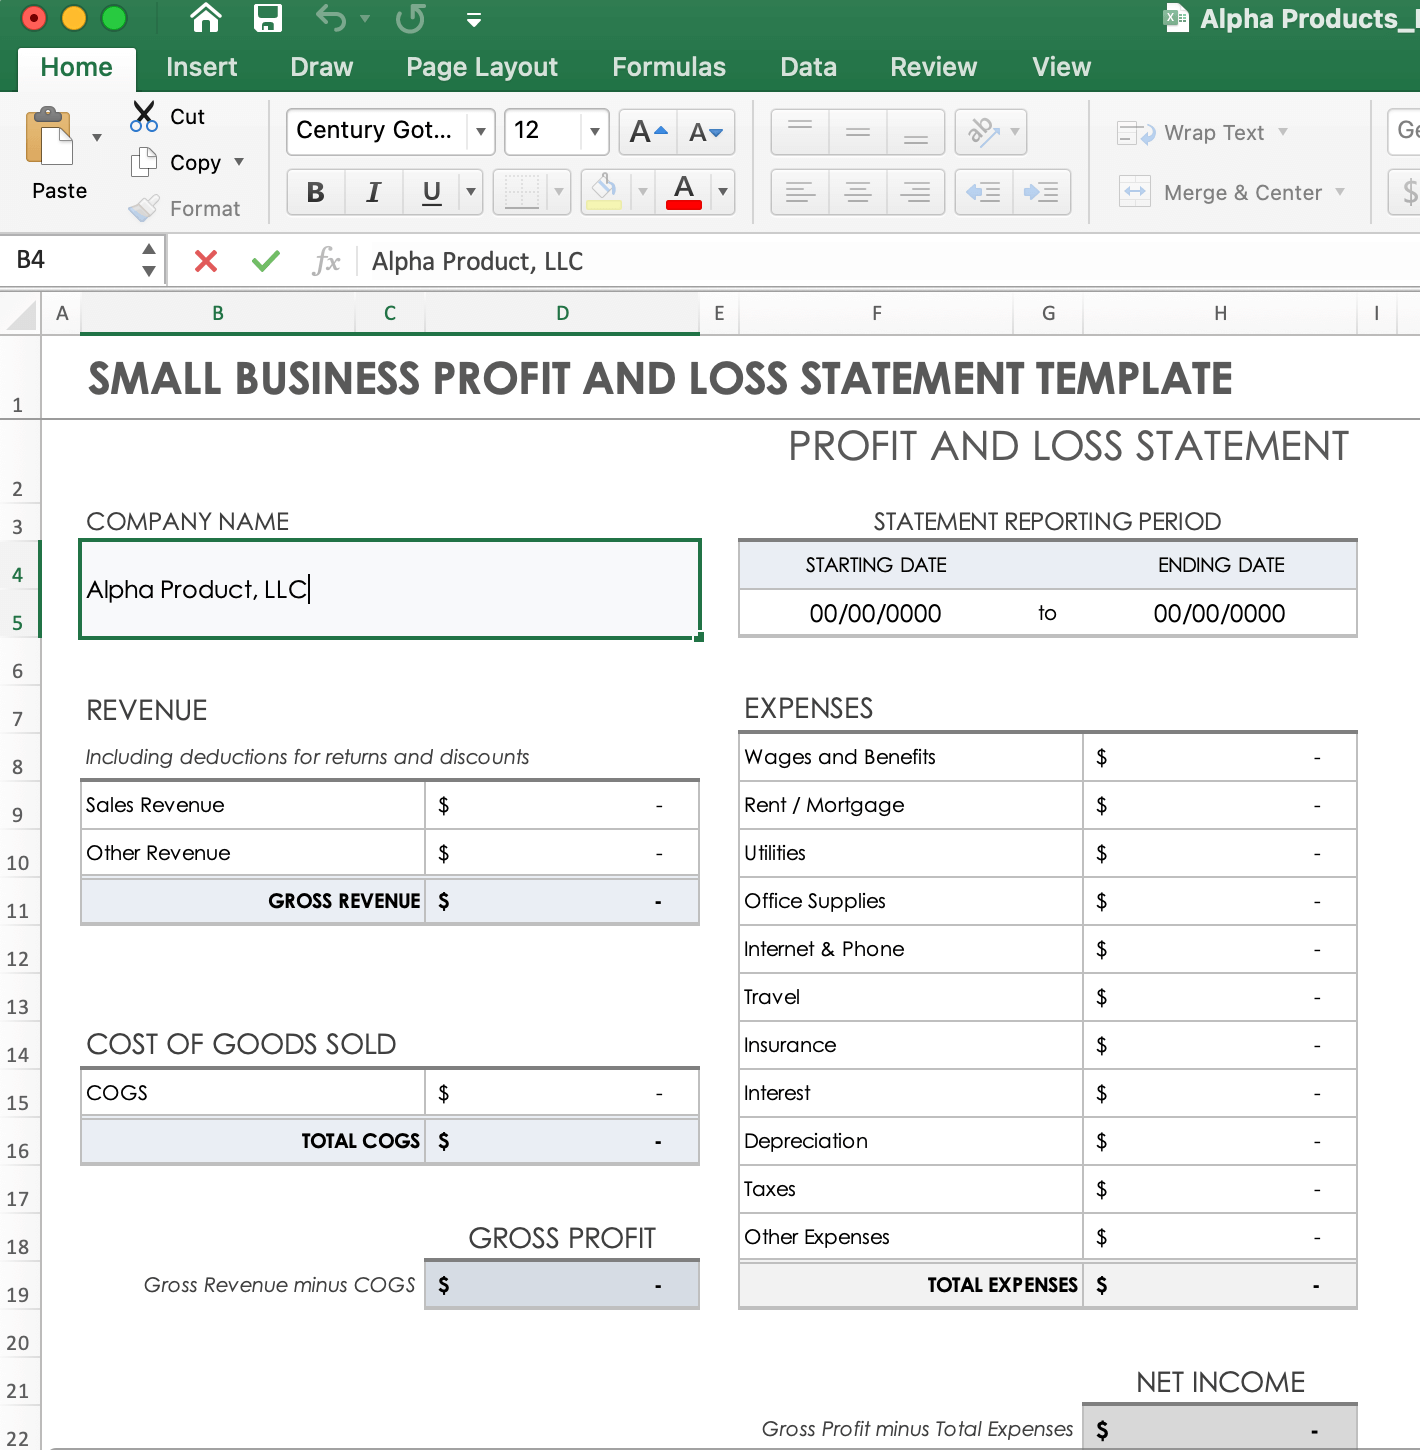
- Type the business name in the Company Name cell.
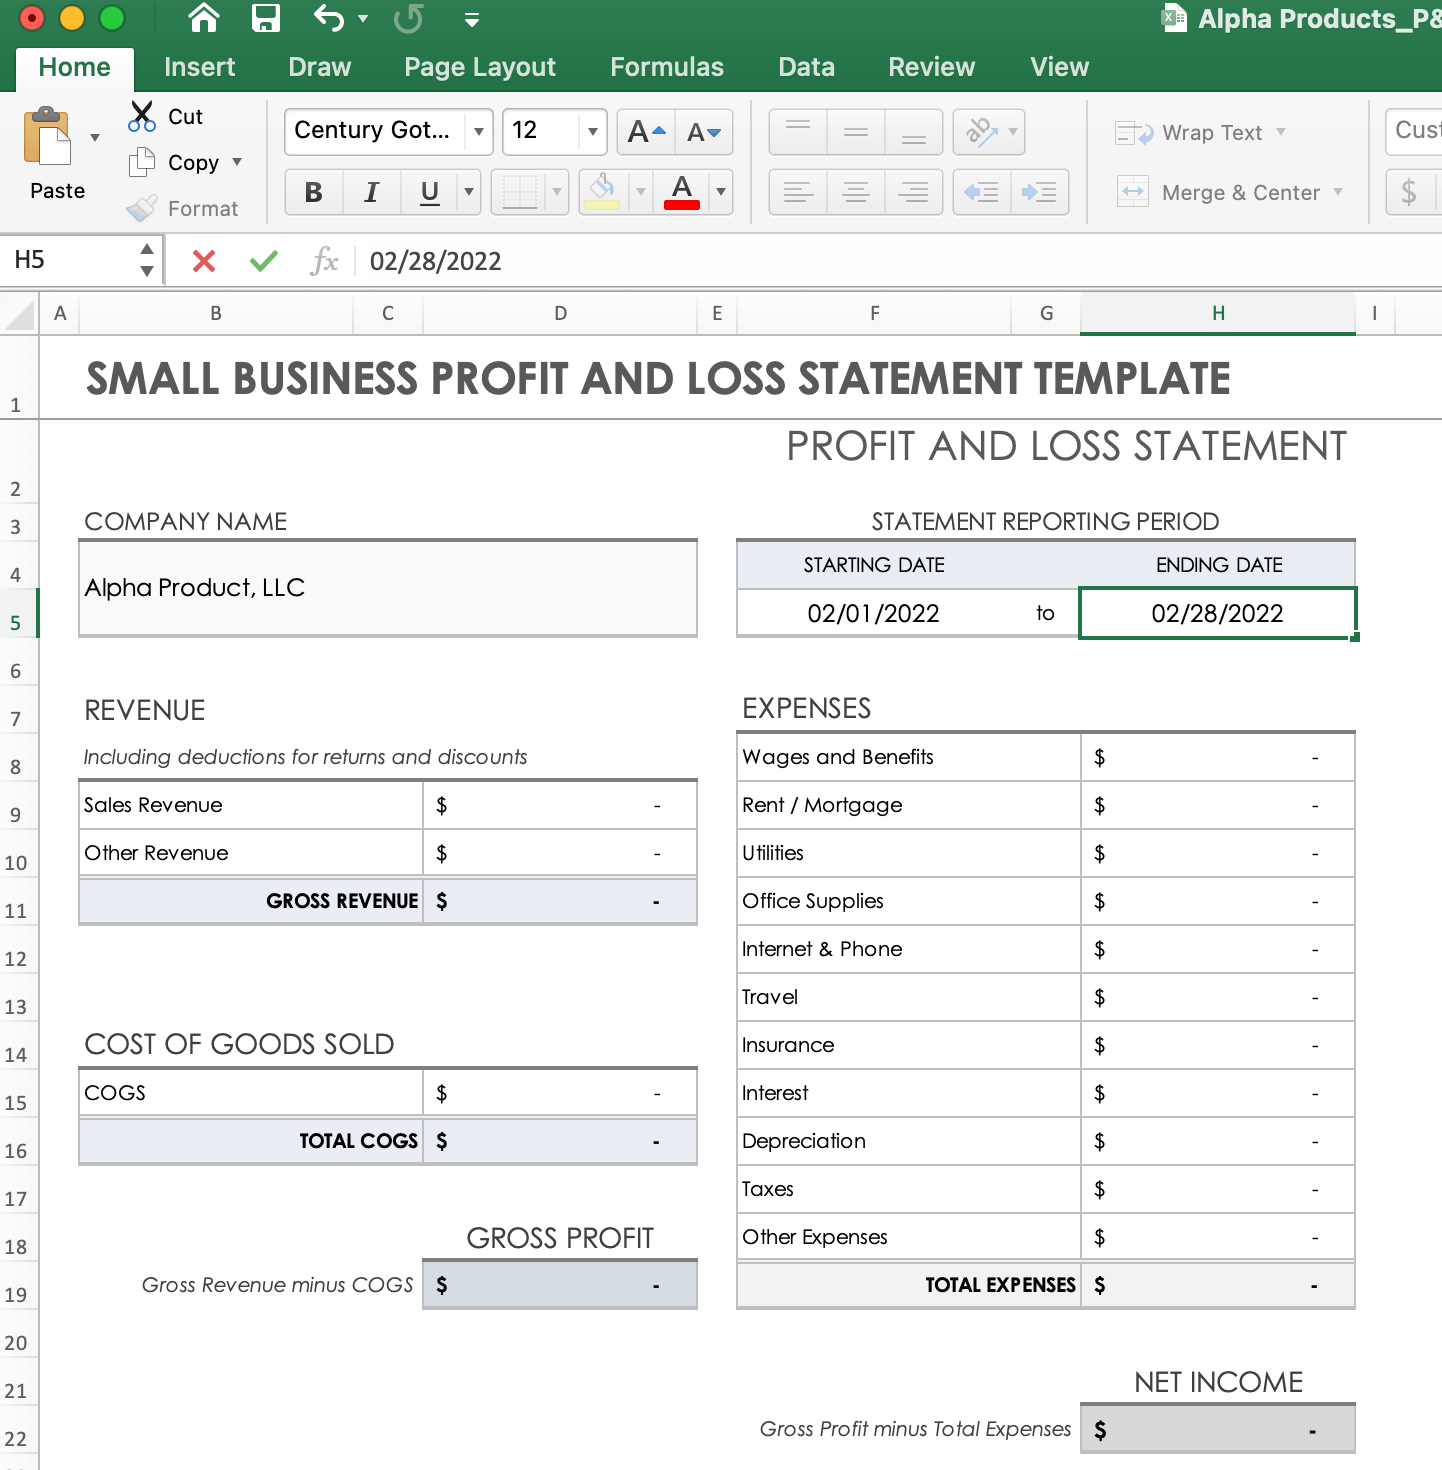
- Type in the reporting period start and end dates in the Statement Reporting Period cell. Save the file.
3. Calculate Gross Profit
In order to calculate gross profit, you first need to calculate your gross revenue, or total income, and the total cost of goods sold (COGS). Subtract total goods sold from your gross revenue to determine gross profit:
Gross profit = Gross revenue - COGS
This template has built-in formulas that compute these calculations automatically as you enter information into the relevant sections.
4. Input Sales Revenue to Calculate Gross Revenue
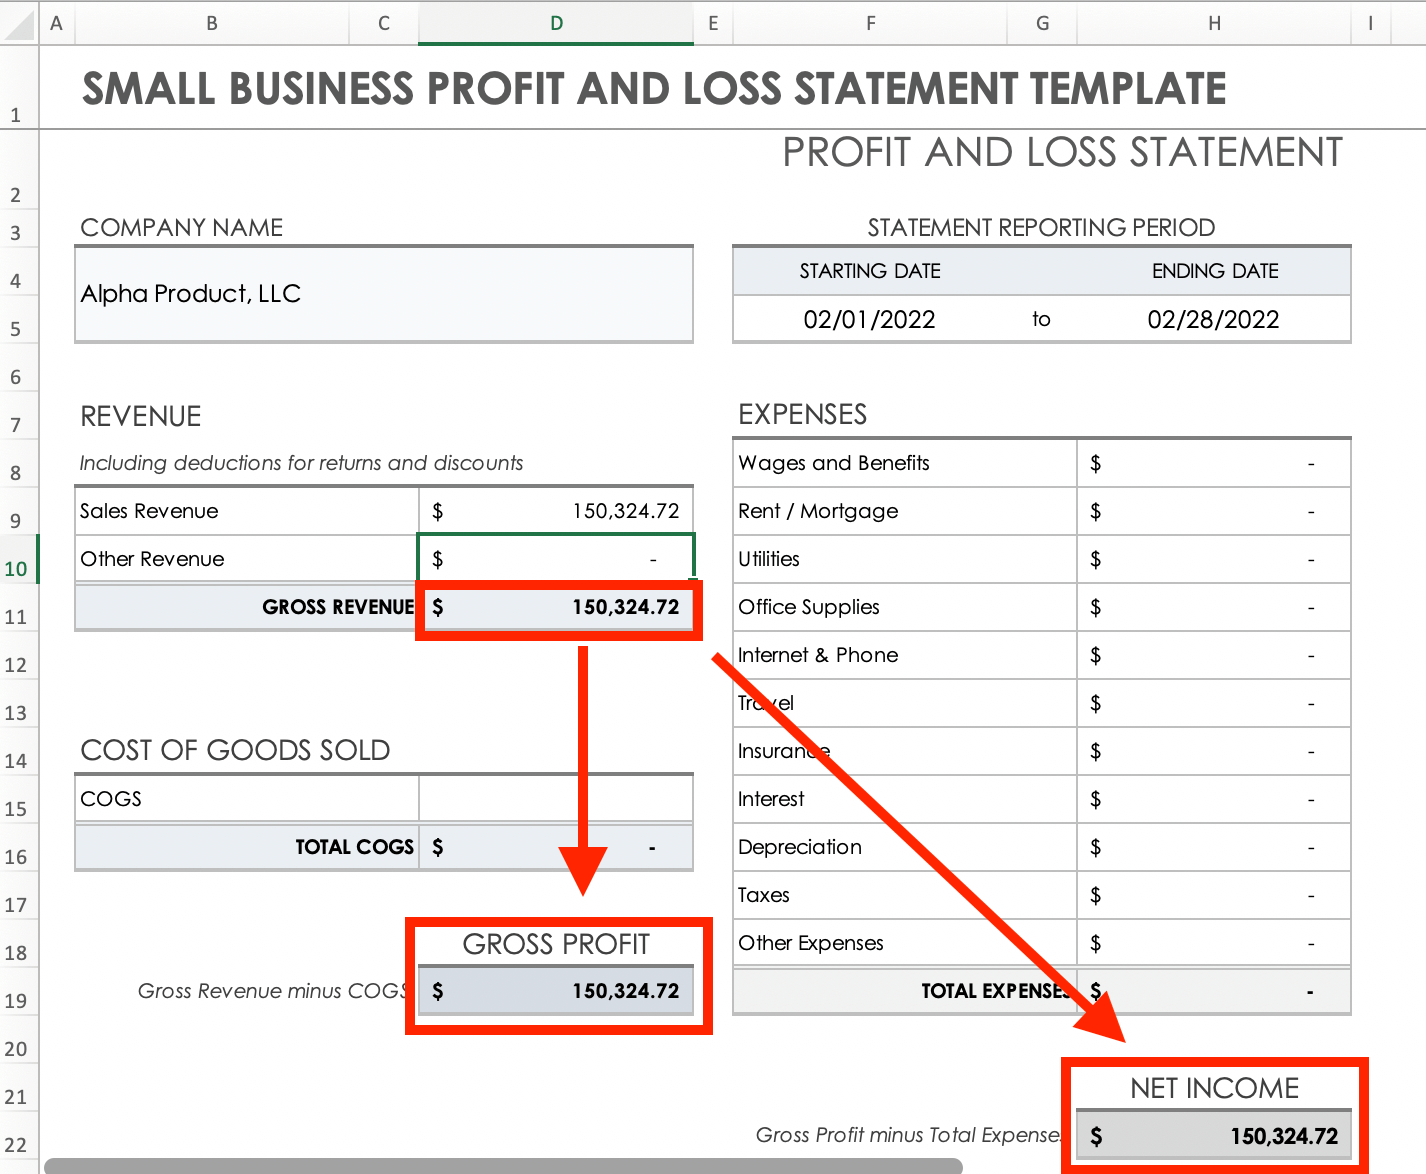
- Find the Sales Revenue cell and click once on the cell next to it to highlight the cell. Calculate your sales revenue from the reporting period and enter the amount into the cell. You do not need to add commas when typing larger amounts.
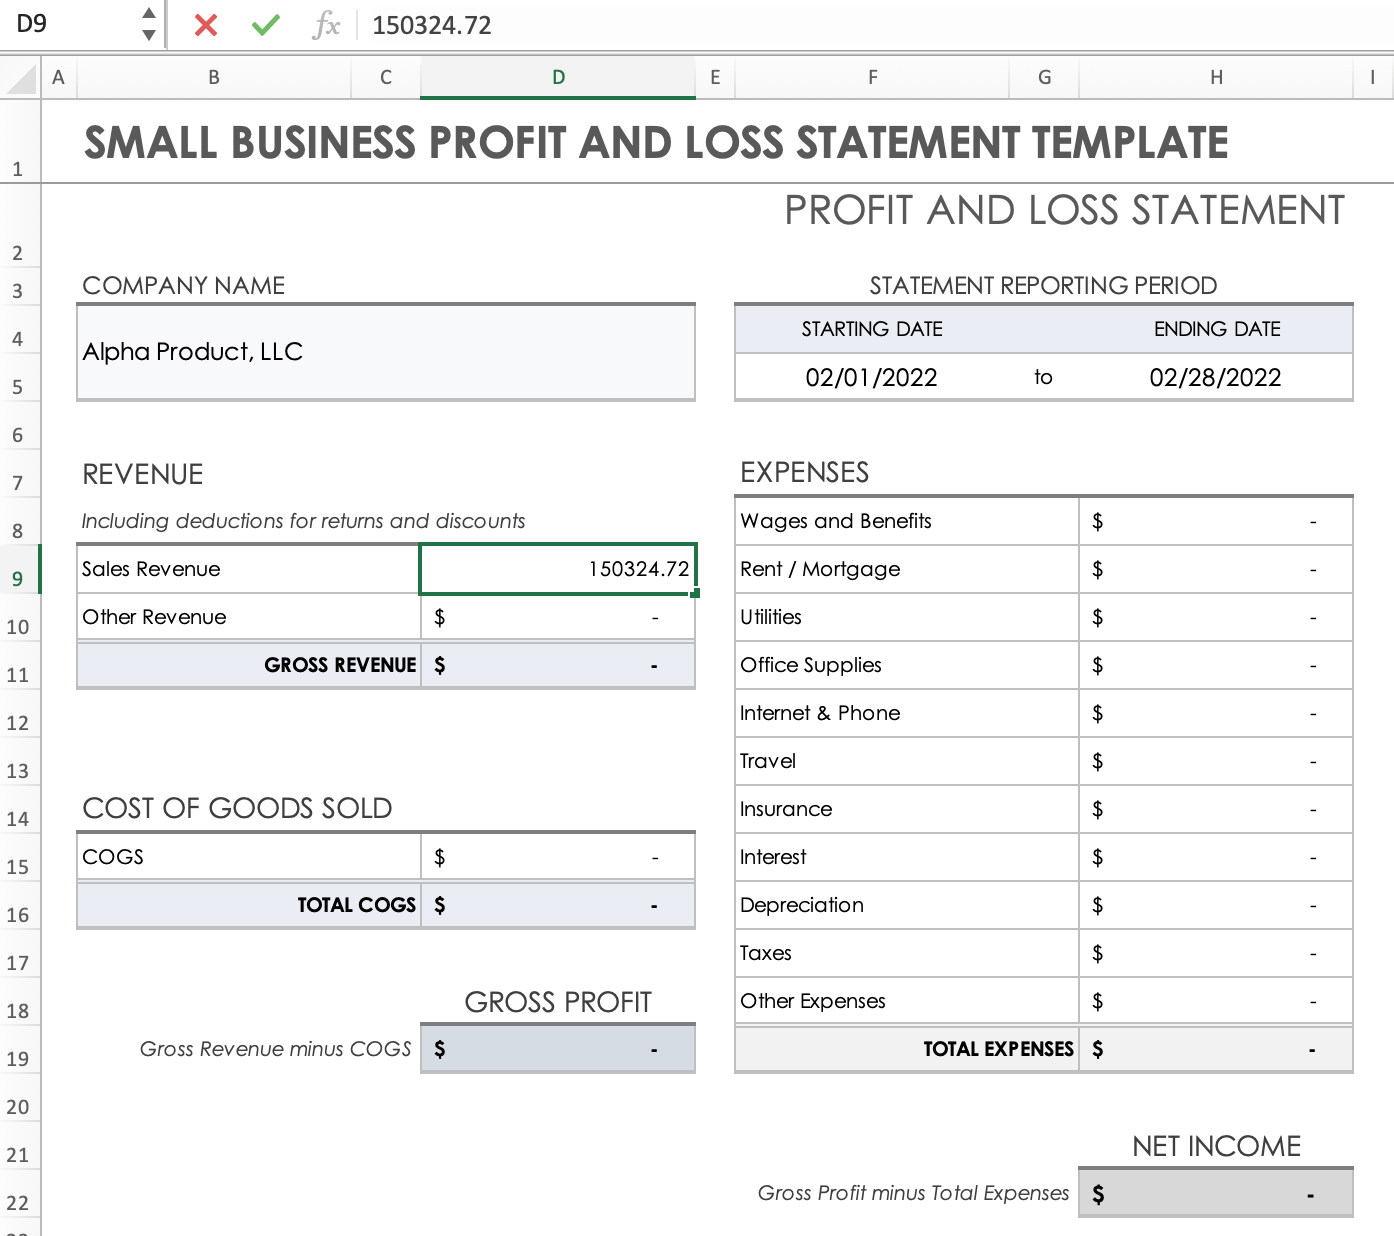
- Press Enter, or click another cell to deselect. The Gross Revenue, Gross Profit, and Net Income cells will automatically populate. At this point, these will be the same as your sales revenue.
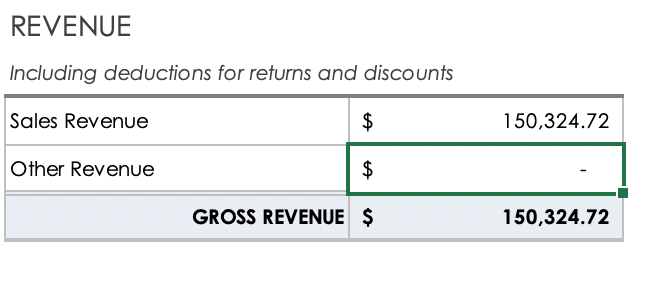
- Reminder: The sales revenue for a basic small business profit and loss statement needs to include deductions for returns and discounts. It does not include taxes, interest, depreciation, or amortization. Those are added to the statement in a later step when you report expenses.
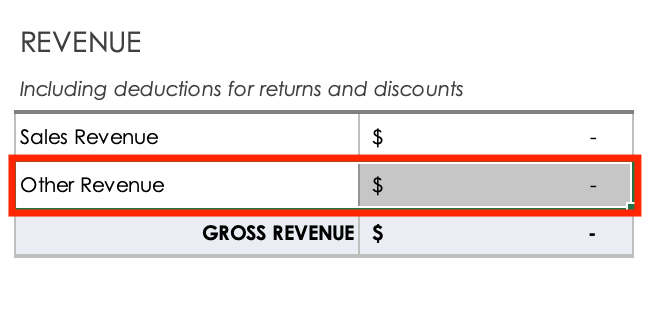
- If you have additional revenue to record, click the cell next to the Other Revenue cell and input the amount. If you have no other revenue to report for this period, leave it blank or enter zero.
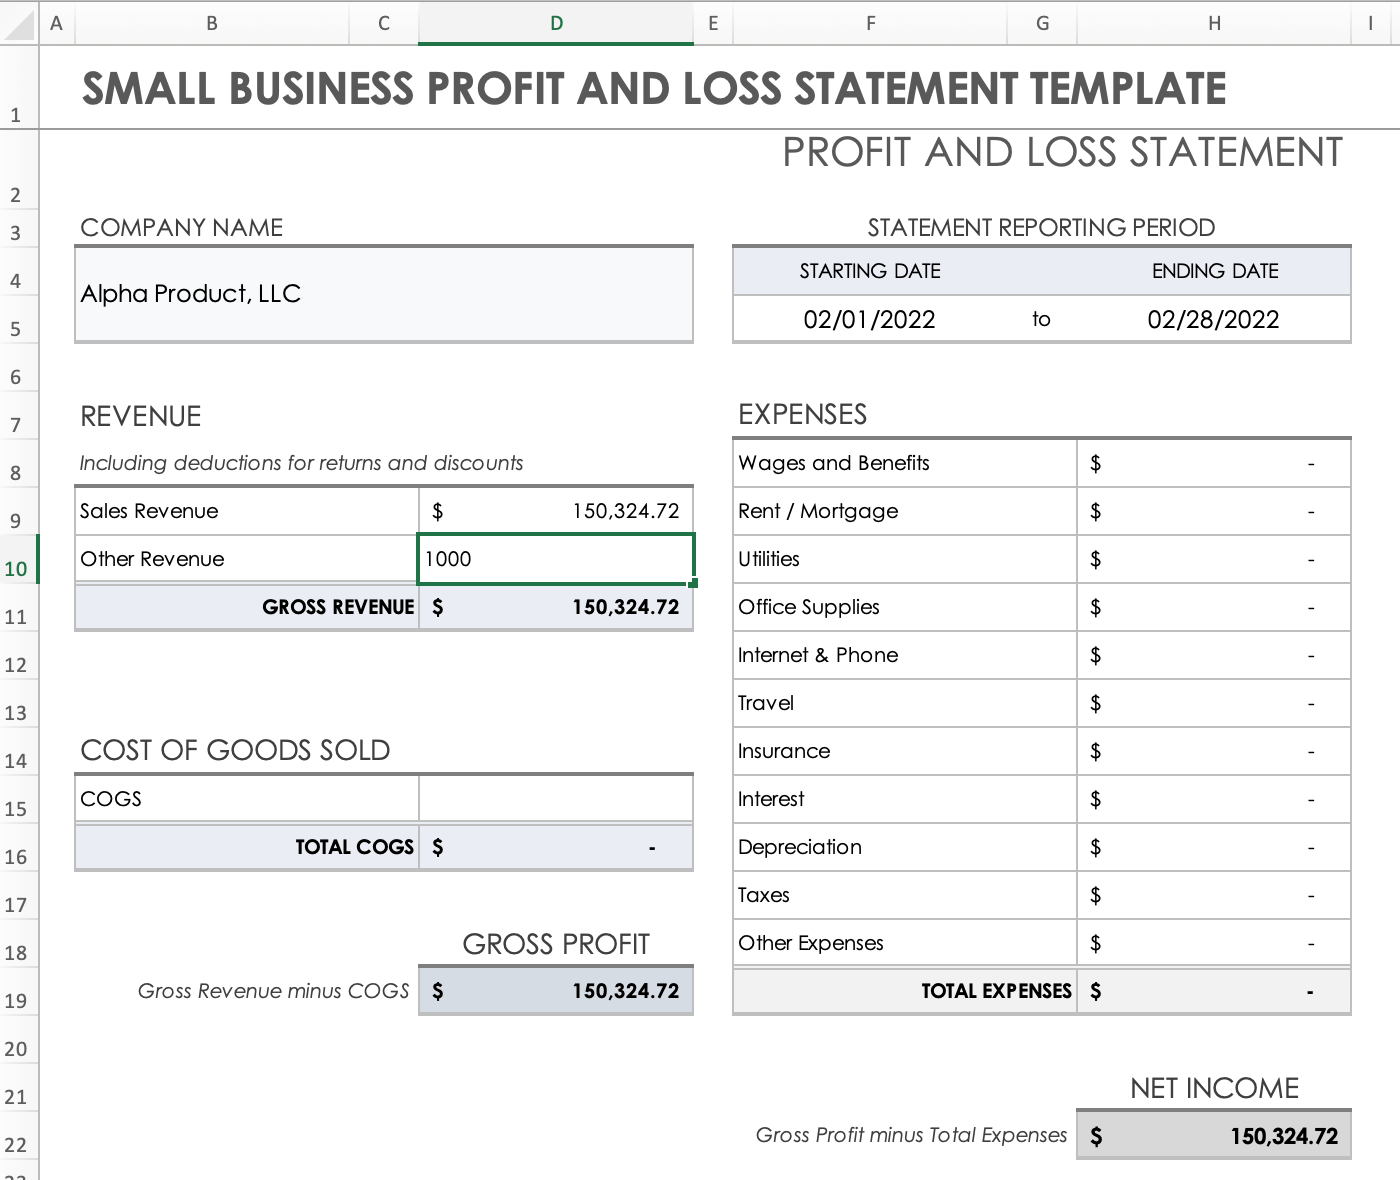
- Press Enter. Again, your Gross Revenue, Gross Profit, and Net Income cells will automatically populate with the updated amounts.
- Reminder: Save your Excel document after every step to avoid data loss. Pro Tip: Customize this revenue section by creating categories that make sense for your business. For example, you might edit and update the text in existing sections to specify revenue sources or add line items to account for additional revenue streams. If you need to add line items, complete the following tutorial. If not, skip to the next section.
- Highlight the last input title and input cell in the Revenue section. To do this, click on the title cell and drag your cursor to the right, releasing the cursor only once all desired cells are highlighted. Another method is to click once on the title cell, then press Shift and click on the cell to the right to highlight both cells.
- Copy the highlighted cells using Command + C (Mac) or Ctrl + C (PC), or by right-clicking on the cells and selecting Copy from the dropdown menu.
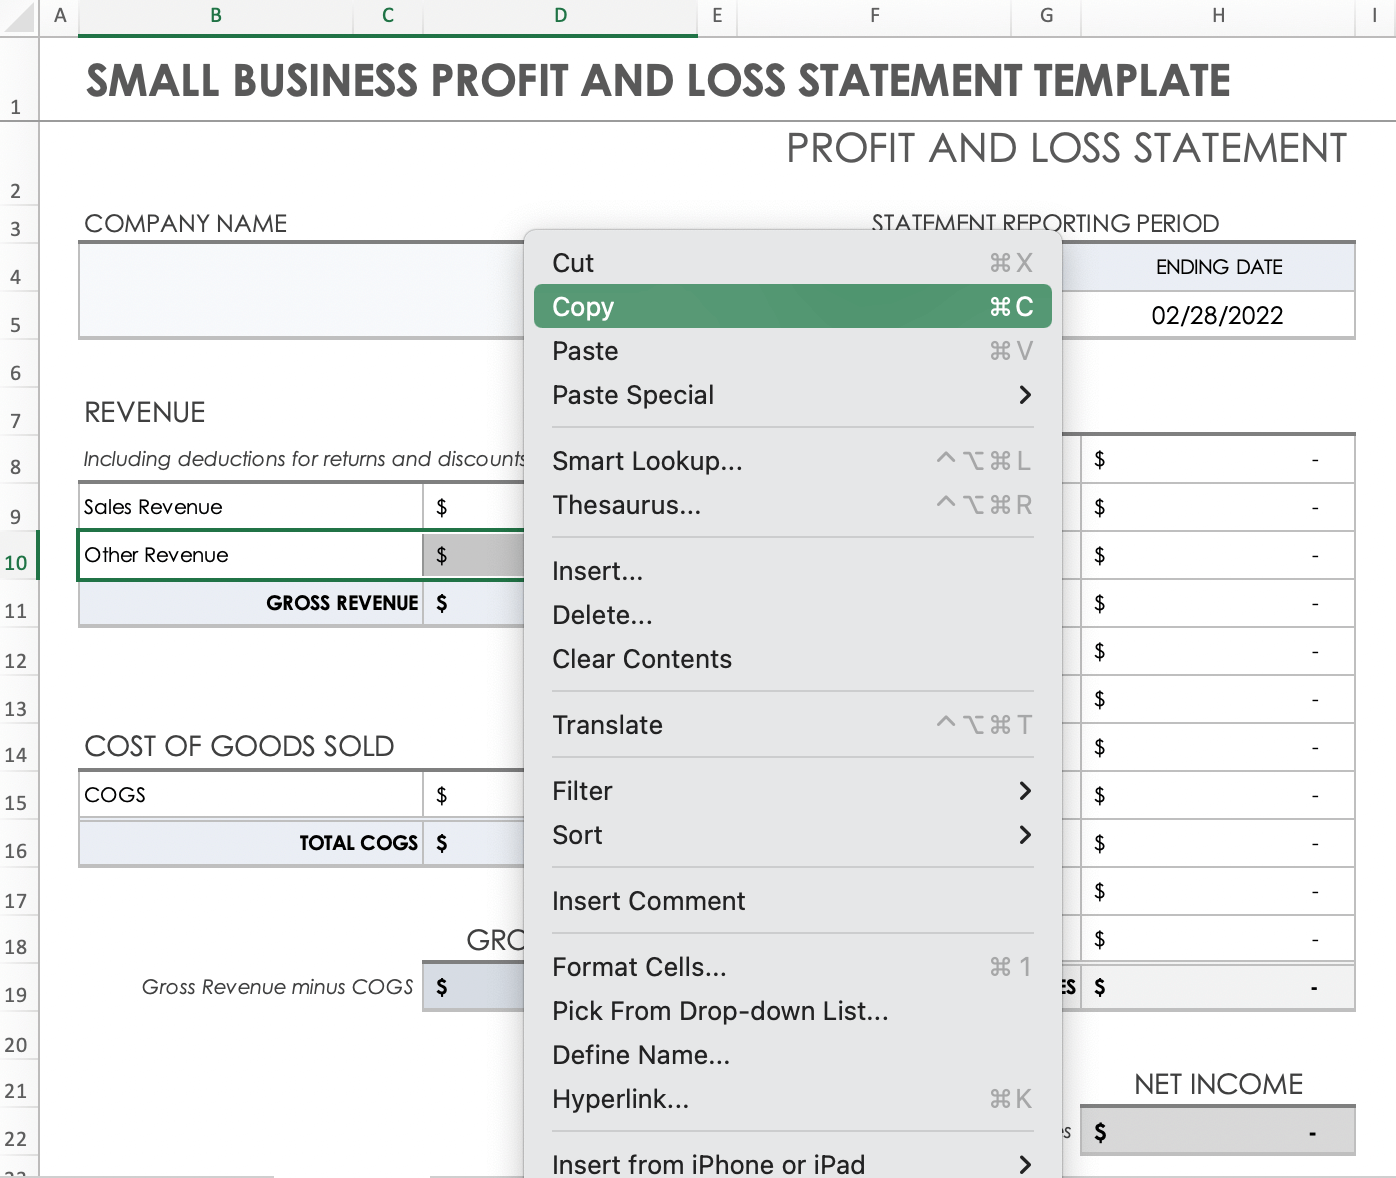
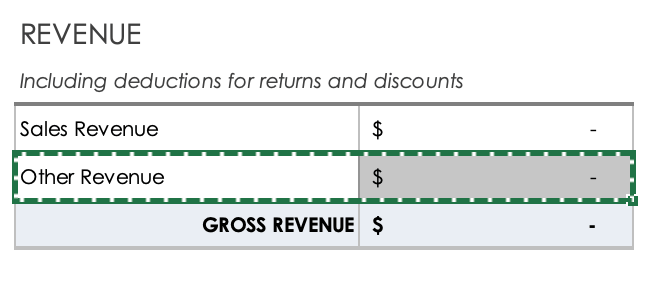
- Once copied, a dotted-green line will appear around the highlighted cells.
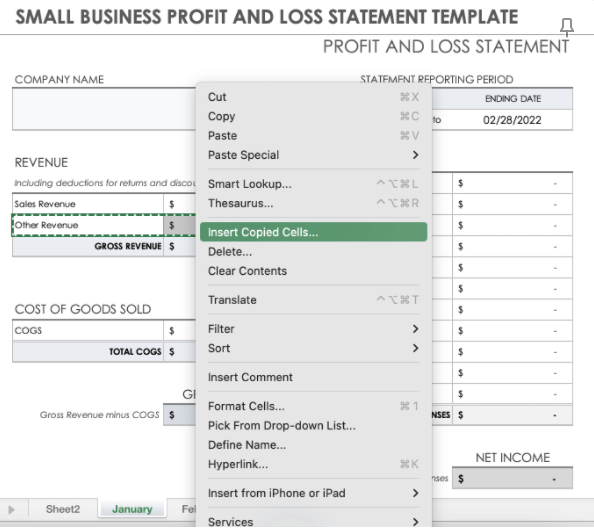
- Hover the cursor over the copied cells and right-click. A new menu will appear. Select Insert Copied Cells from the dropdown menu.
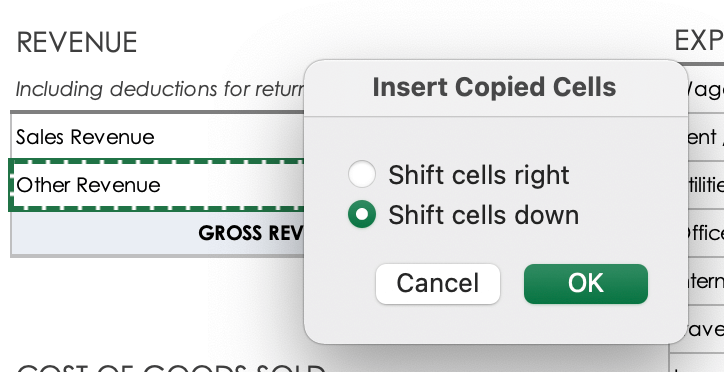
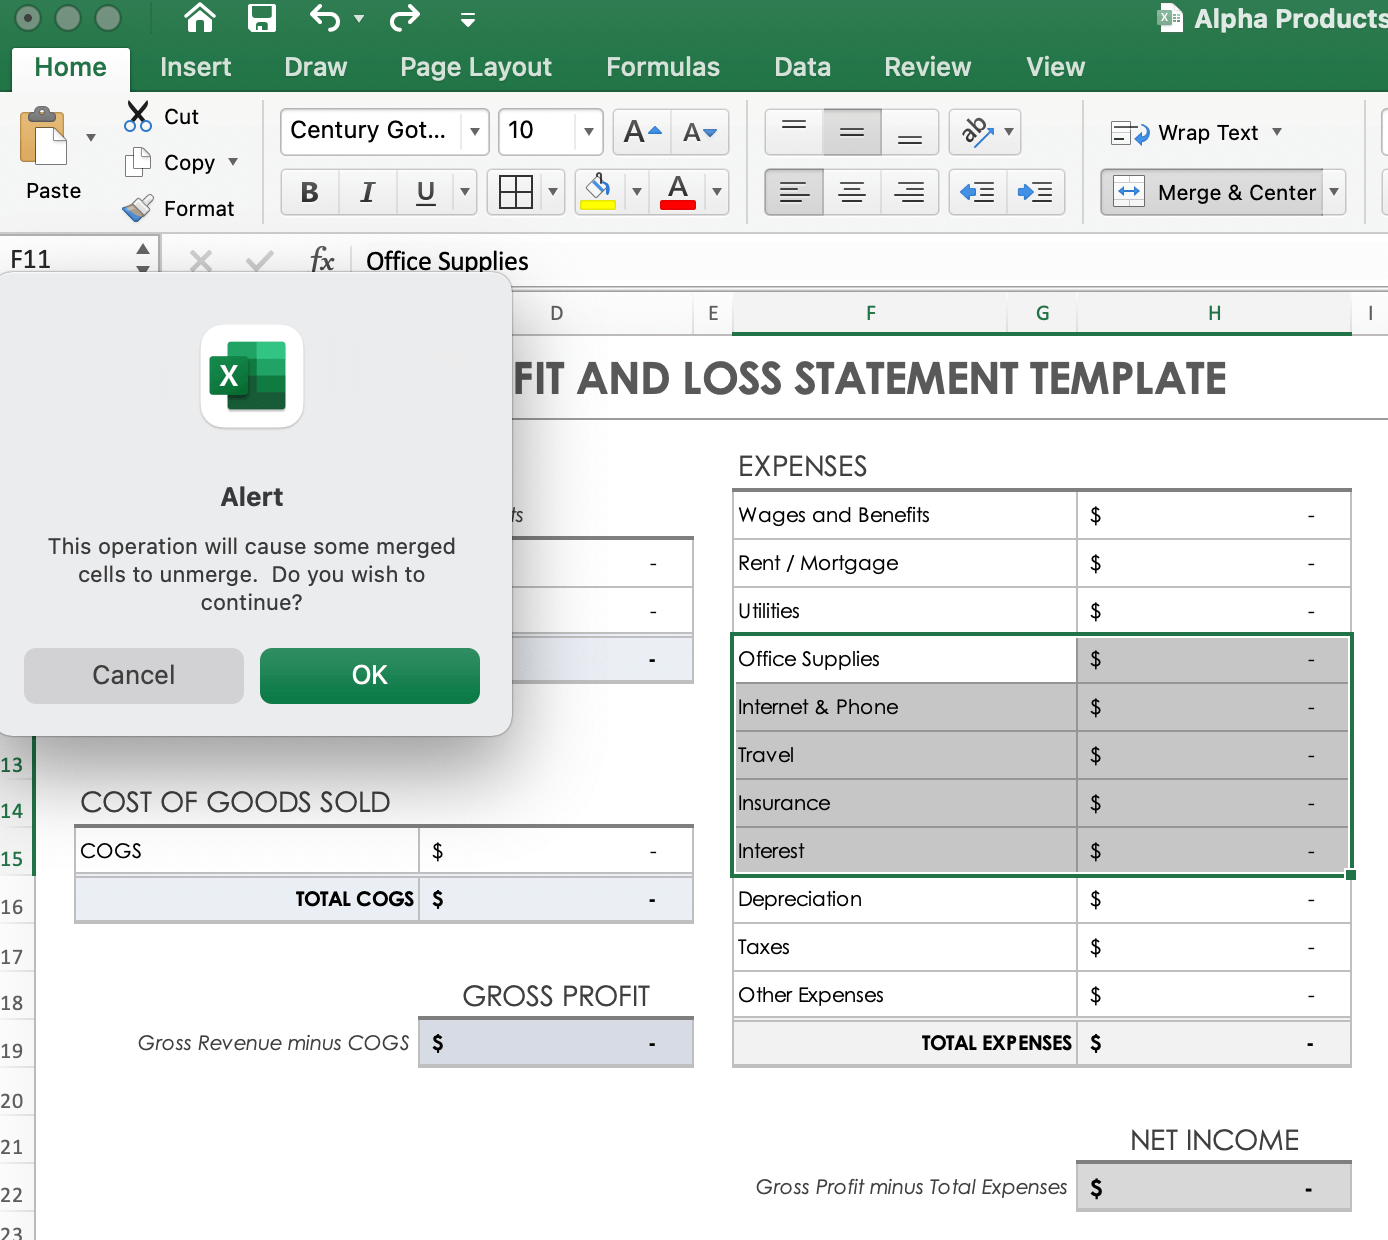
- A new pop-up menu will appear. Select the Shift cells down option and press Enter or click OK.
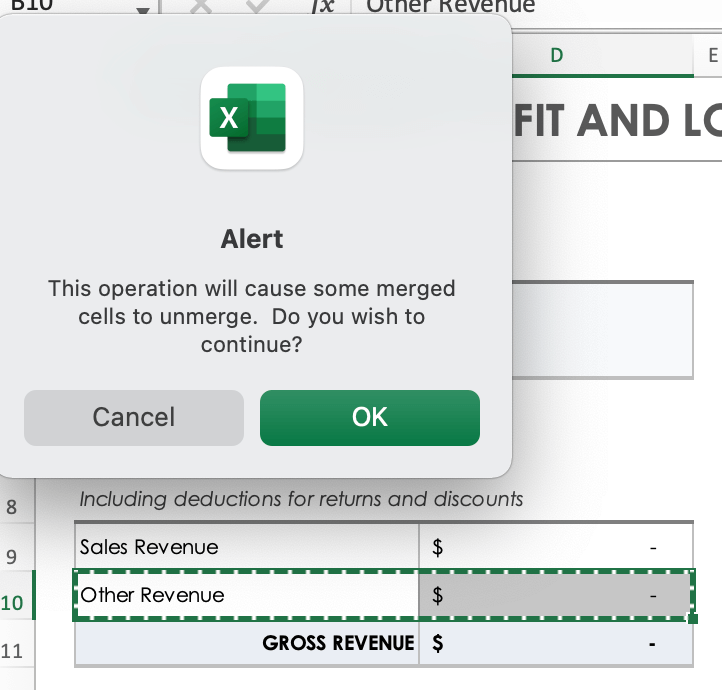
- A pop-up message will appear, warning you that the operation will cause some merged cells to unmerge. Click OK.
- A new row will appear below with the copied Other Revenue cells.
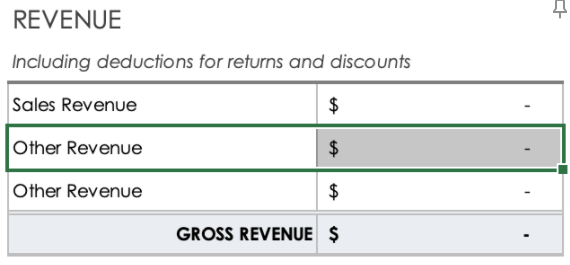
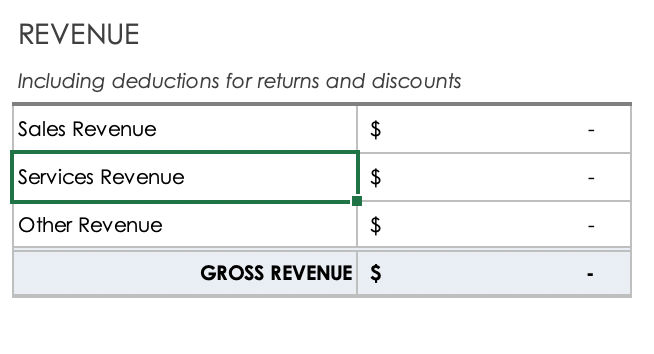
- Click on the New Title column and enter a title. When you enter the amount in the adjacent cell, the template will continue to calculate gross revenue, gross profit, and net income. Repeat the process if the revenue section needs more custom rows.
5. Input the Cost of Goods Sold (COGS)
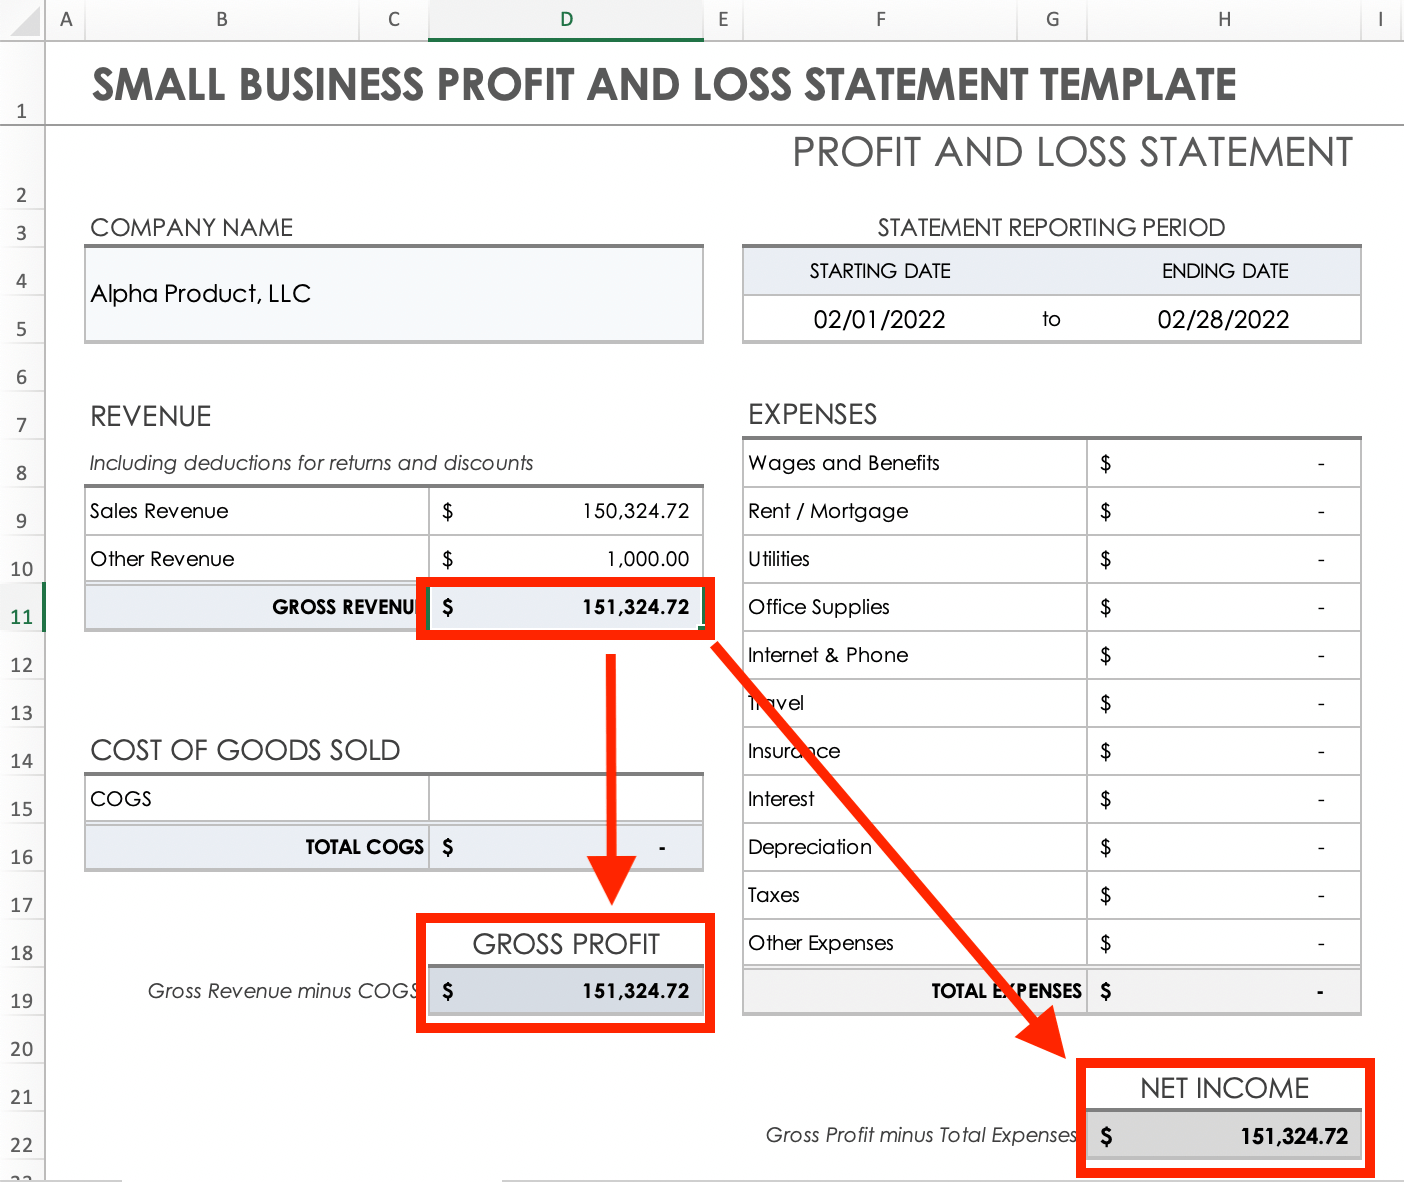
- Locate the Cost of Goods Sold section below the Revenue section. Click once on the input cell to the right of the COGS in Column D and input the total cost of goods sold for the reporting period.
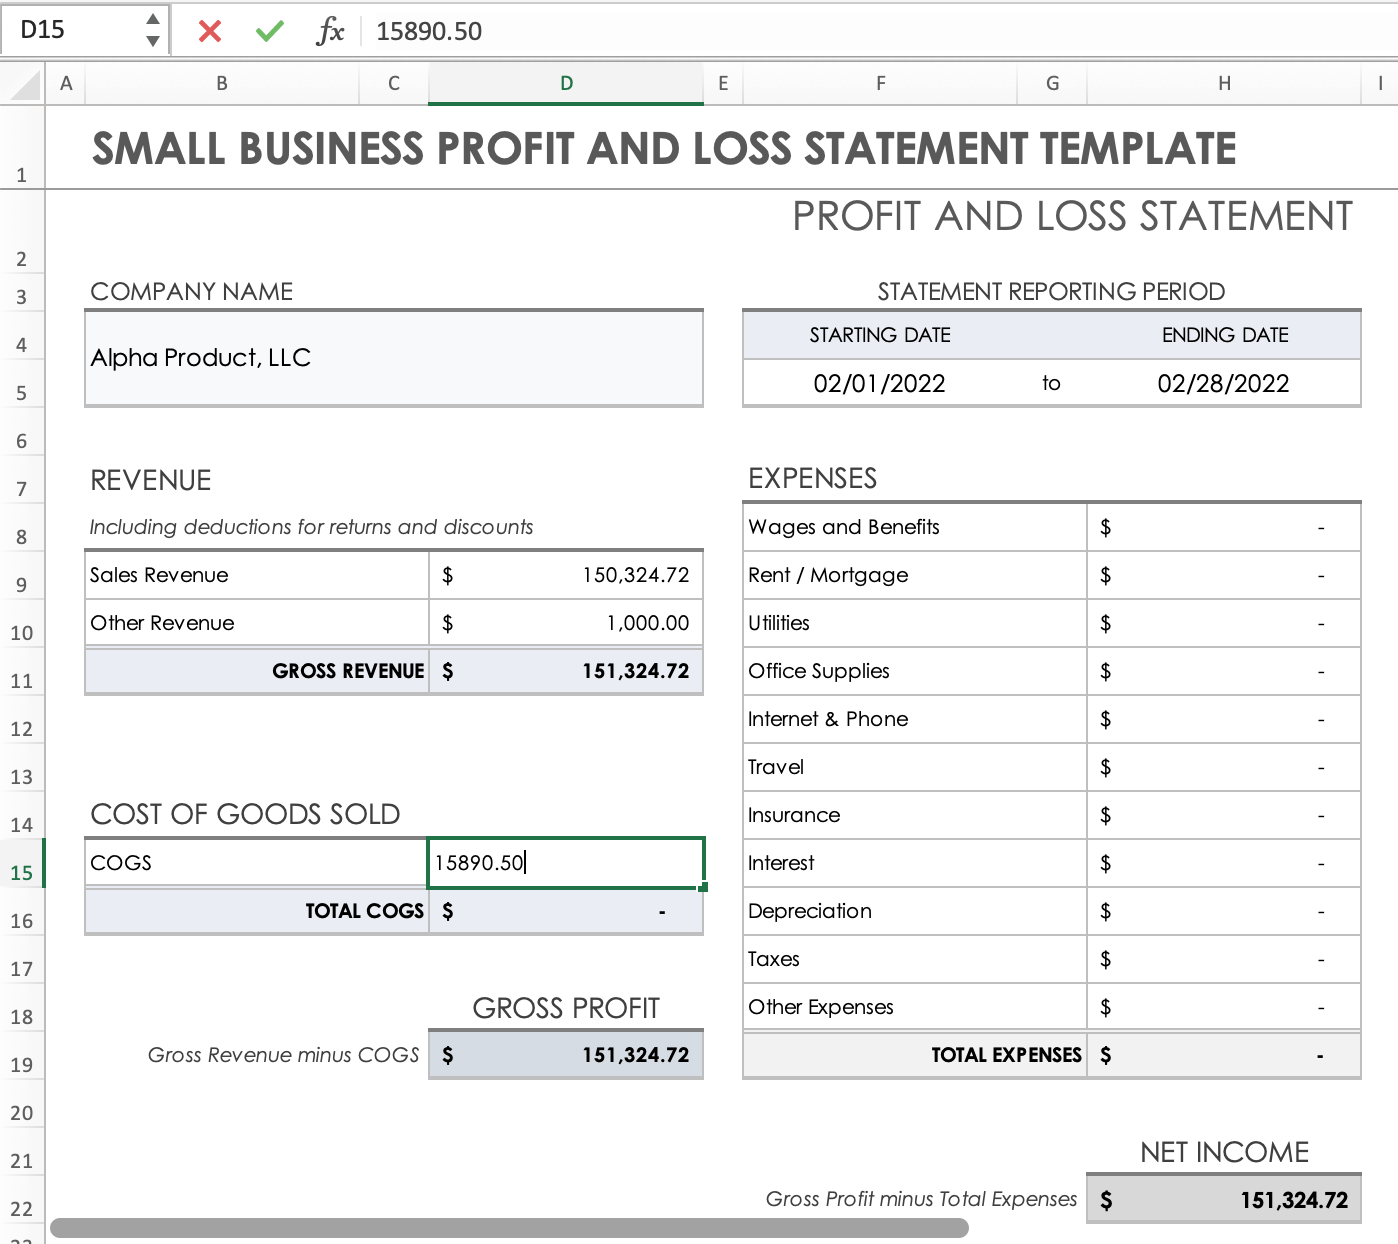
- Press Return. The COGS and Total COGS cells will populate.
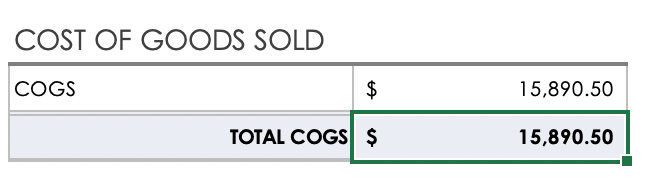
- The template will also calculate the gross profit by subtracting the total COGS from the gross revenue. Review the amounts to make sure the calculations are accurate.
- Pro Tip: The gross profit will be listed either in black, indicating a profit, or in red with parenthesis, indicating a loss.
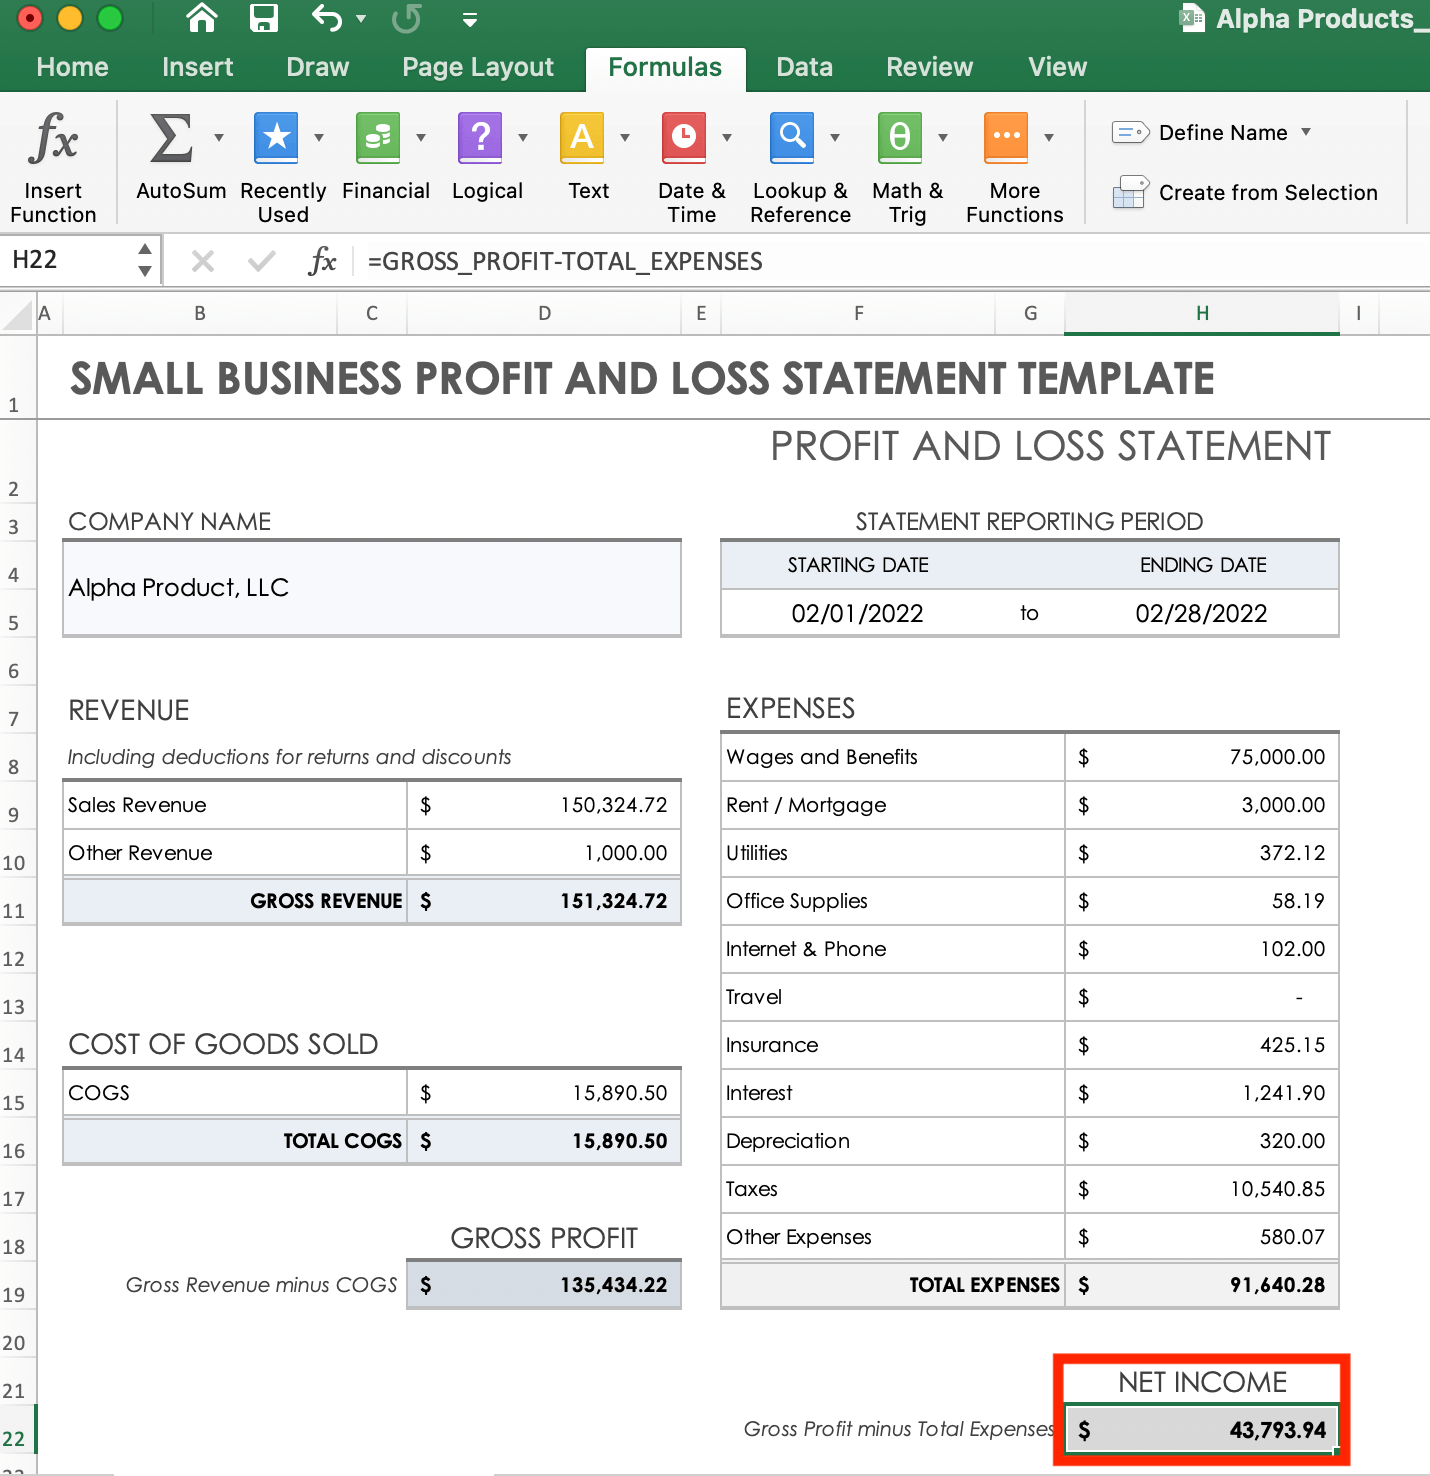
6. Calculate the Net Income
This template uses the following formula to calculate net income:
Net income = Gross profit - total expenses
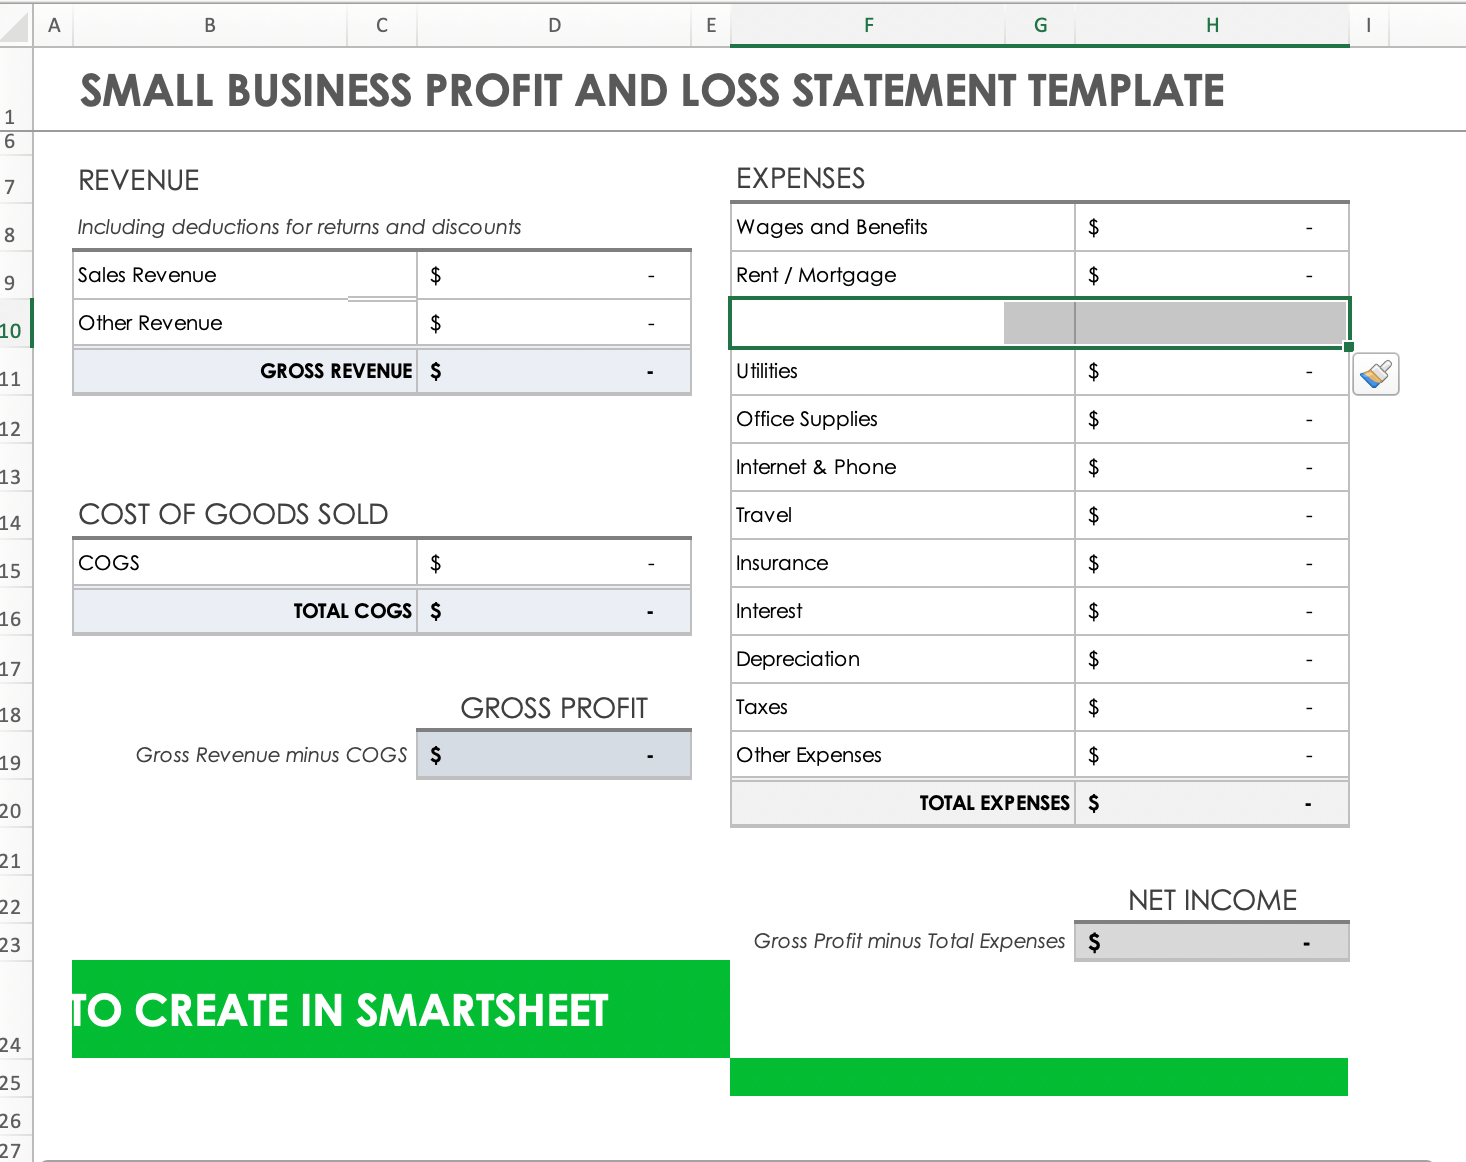
7. Input Your Business Expenses
By following the steps in this section, you will learn how to input the expenses incurred for the reporting period and how to customize the template for your business by adding and deleting expense rows. Before you start, you may want to calculate your expenses in one location using our free small business expense templates.
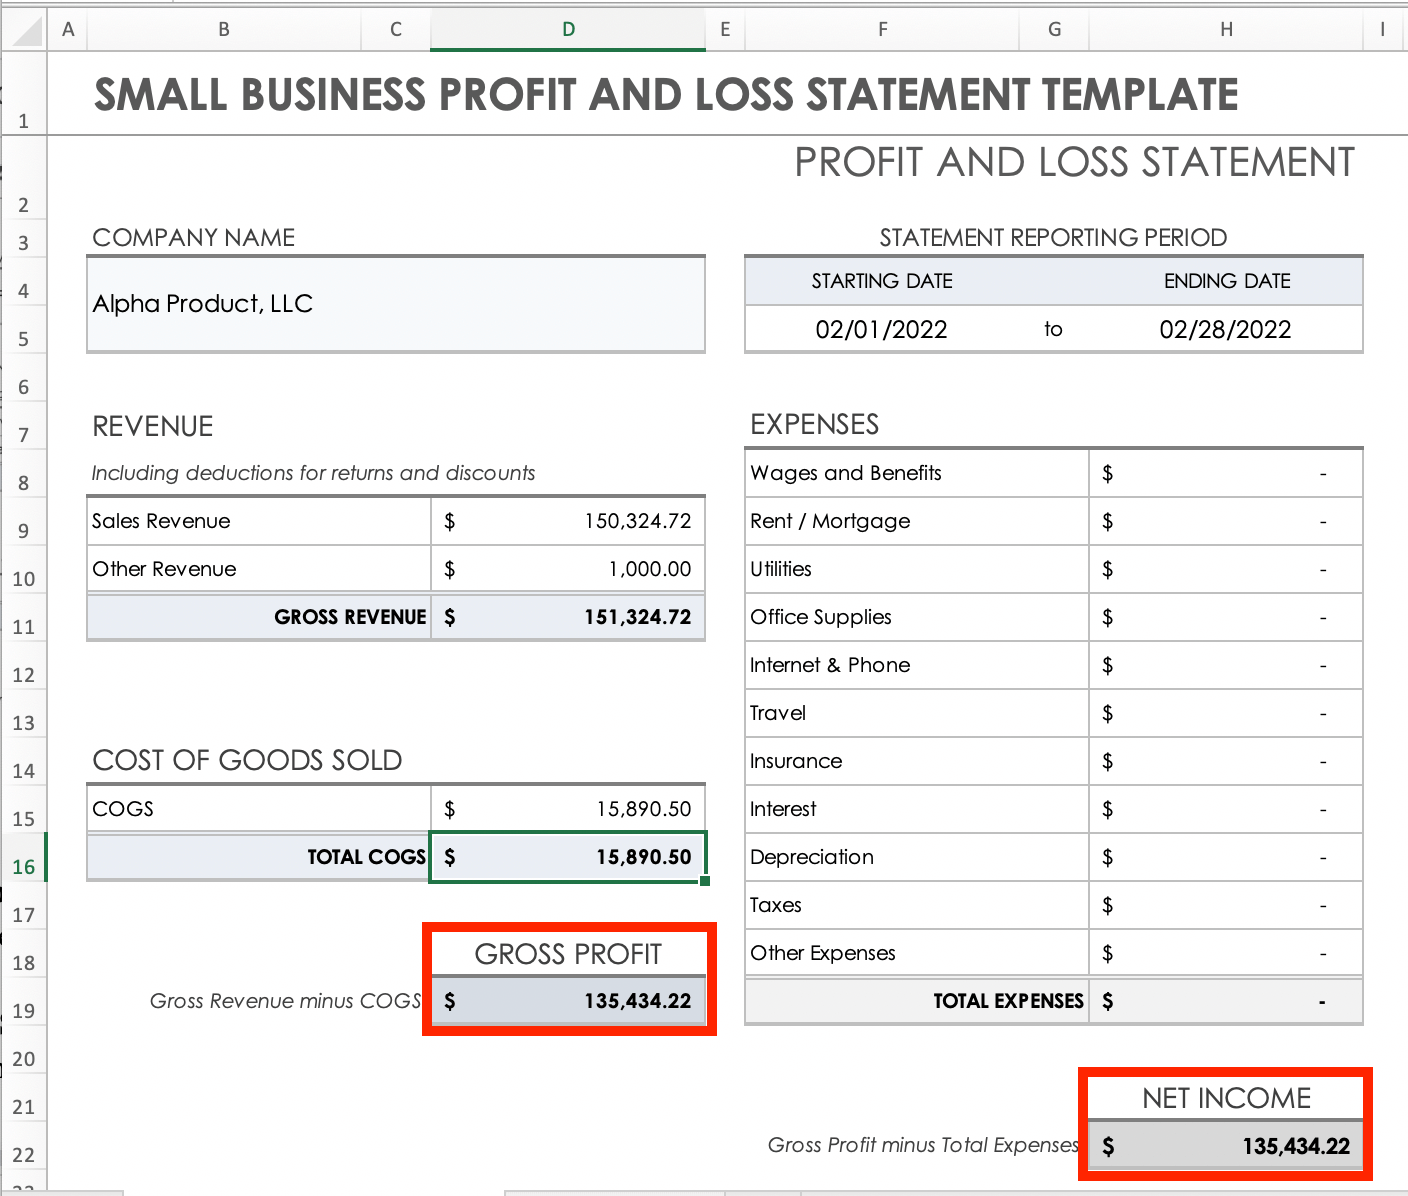
- Start by clicking on the Wages and Benefits cell and inputting the total wages and benefits for the period.
- Press Return. The template will automatically add the number to the Total Expenses column and update the amount in the Net Income cell.
- Repeat steps one and two in this section for each of your expenses.
8. Customize Your Expense Categories
After you complete the profit and loss template and record your net income for this period, create expense categories that make the most sense to you with this easy-to-customize template. The following tips will help you with the most common template adjustments:
- Renaming an Expense Without Adjusting Cells: Click on the title cell you wish to rename. Type in your desired category title, and either press Return or click on the next cell. Delete any expense category title without adjusting cells by clicking on the title and pressing Delete to leave the row blank.
- Adjusting Expense Cells: To customize expenses and match the exact number of categories, you can add or delete a line item as needed.
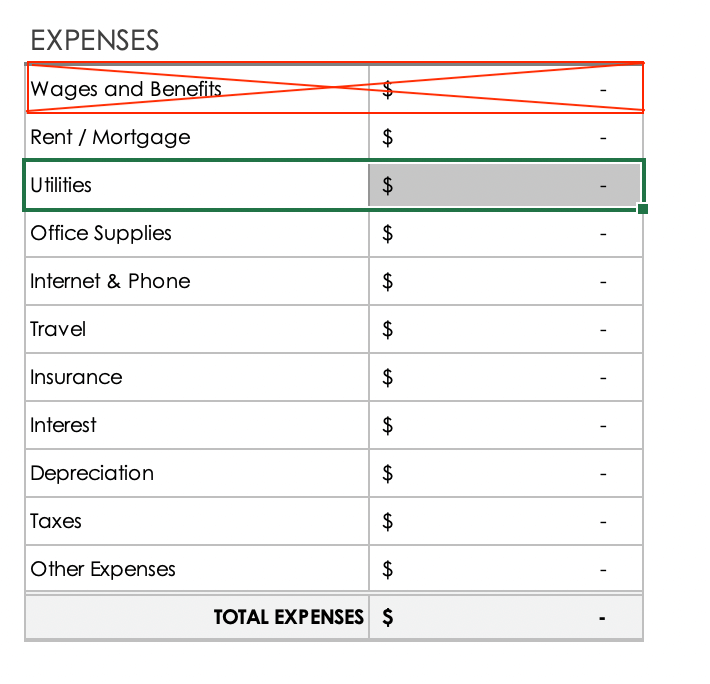
Adding New Expense Row Cells
Highlight a selected expense category title and input cell. Do not use the first row (Wages and Benefits) to avoid inconsistent cell formatting.
- Right-click on the highlighted row cells. Select Insert….
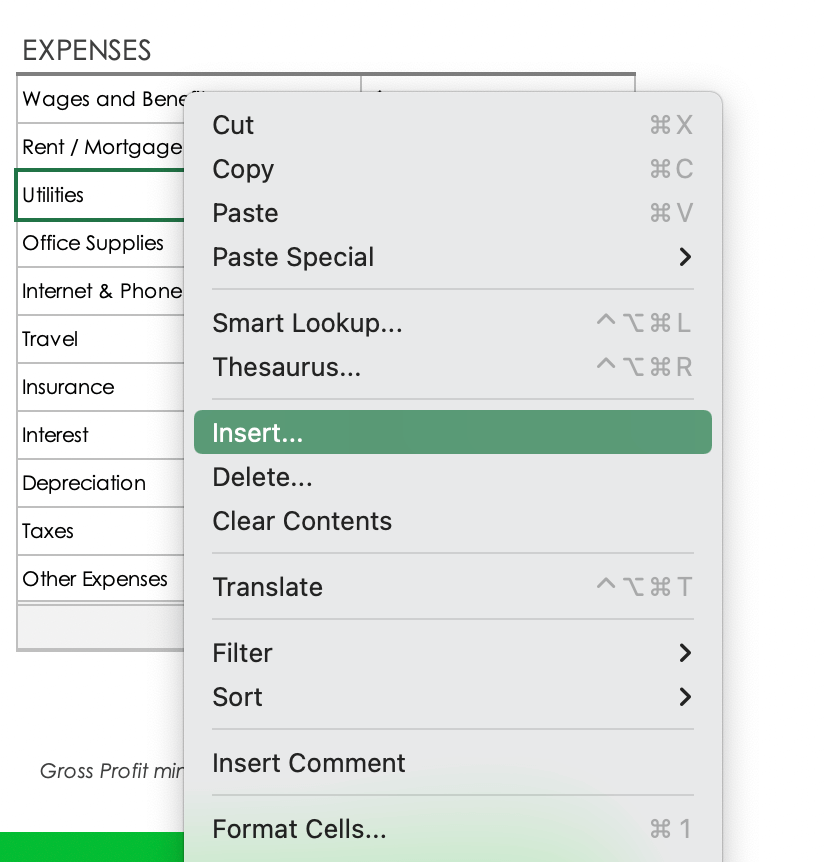
- On the dropdown menu, select the Shift cells down and then click OK.
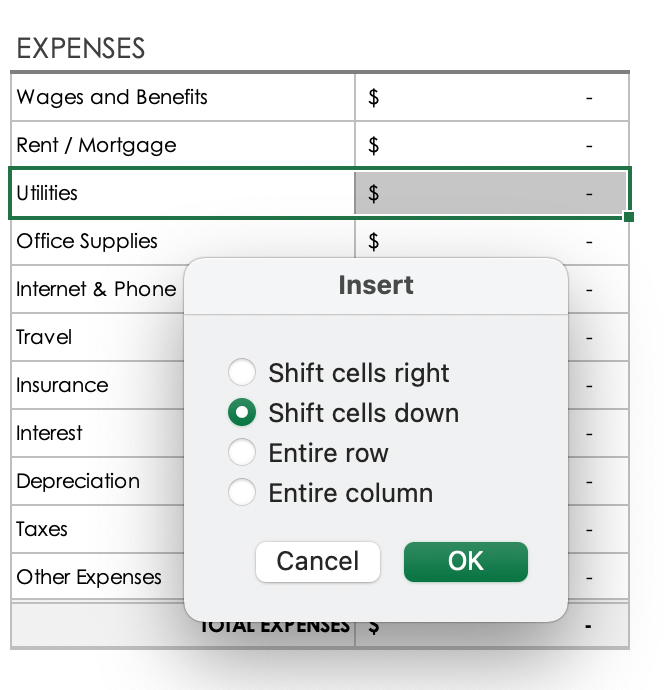
- A new alert menu will pop up. Click OK.

- An empty expense row with a title cell and an input cell will appear in the same row and shift the existing cells down. Add your custom category title to the cell and enter the expense amount in the input cell to the right. The template will continue to update your total expenses as you add customized rows.
- Pro Tip: You can add or delete multiple rows at once. To add, highlight as many rows as you would like to insert. Follow steps two through five with multiple rows selected.
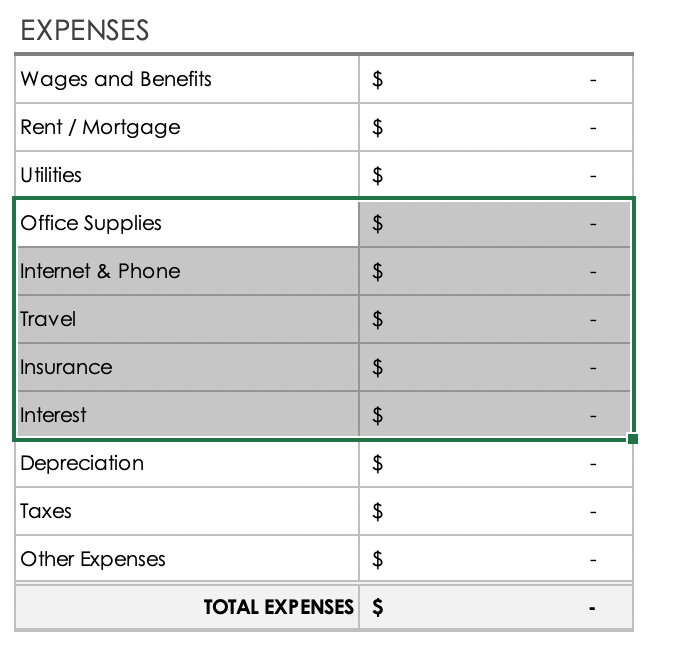
Deleting Expense Row Cells
- Select the expense row or rows you wish to delete by clicking on a single cell and dragging the mouse over the remaining cells.
- Right-click the highlighted cells. Select Delete… from the dropdown menu.

- A new Delete menu will pop up. Select Shift cells up and then click OK.
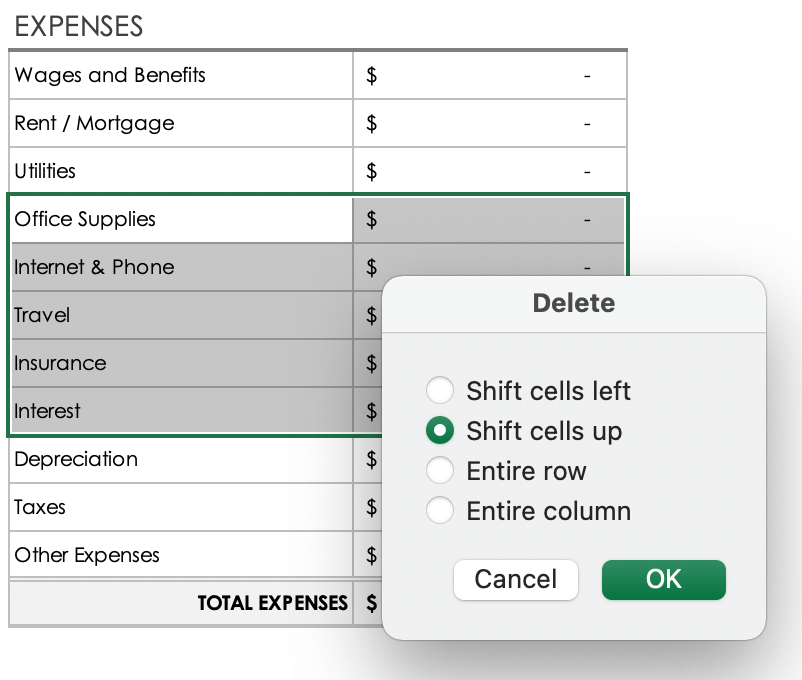
- An alert menu will pop up. Click OK.
- The selected cells will be deleted and the existing expense rows will move up.
- Pro Tip: Clean up your newly formatted spreadsheet by deleting any extraneous template banners that moved while reformatting document cells. Highlight any non-formatted cells you wish to delete, and use the delete process above to create a tidy, customized spreadsheet.
How to Maintain a Profit and Loss Account in Excel
Maintaining a profit and loss account in Excel allows you to make informed business decisions that improve your chances of profitability over time. Keep an extended record of each reporting period by creating a column for each month or quarter.
Statement maintenance is crucial to monitoring finance trends over time. Use Excel to maintain, forecast, and strategize by putting the profit and loss figures for multiple reporting periods under one column.
“A forecast is simply taking the last few months from the profit and loss statement to look into the future to make informed decisions,” says Prior. “Then you can make those informed decisions in two contexts. First, look at the actuals over time to forecast into the future, and second, see how your business did that month versus what you expected to happen. This helps you truly understand what’s driving your business.” Prior explains that the entire exercise takes only 10-15 minutes and can help make your small business profitable. “If you do this exercise faithfully for three or four months, you will make money in your business.”
Below are additional tips for creating a successful maintenance system for income statements:
- Organizing: A solid organizational system is crucial to success. Save individual Excel files for each reporting period over the fiscal year within a folder.
- Expanding: As your business grows, your reporting system should follow suit. Keep one year’s profit and loss statements in a single Excel file and create multiple tabs for individual reporting periods. You can design your own annual report by creating monthly columns, or use one of our free 12-month profit and loss templates.
- Visualizing: Data visualization is a helpful tool for reviewing financial information and recognizing trends. After calculating your profit margins, create graphs that represent changes in data over time.
- Budgeting: In order to grow a profitable business, it is necessary to craft a budget. Use your profit and loss statement when developing your budget with our free small business budget templates.
- Bookkeeping: Consistent reporting is key for successful financial reporting. Prior recommends using a bookkeeping system: “Once you hire a bookkeeper, then you don’t have to hand-key into Excel each month.”
12-Month Profit and Loss Statement Excel Templates
Once you have completed the monthly template using our instructions, input the data directly into an Excel spreadsheet or accounting software. View your business’s finances in the context of historical data and maintain your profit and loss statement over the fiscal year.
Basic 12-Month Profit and Loss Statement Excel Template
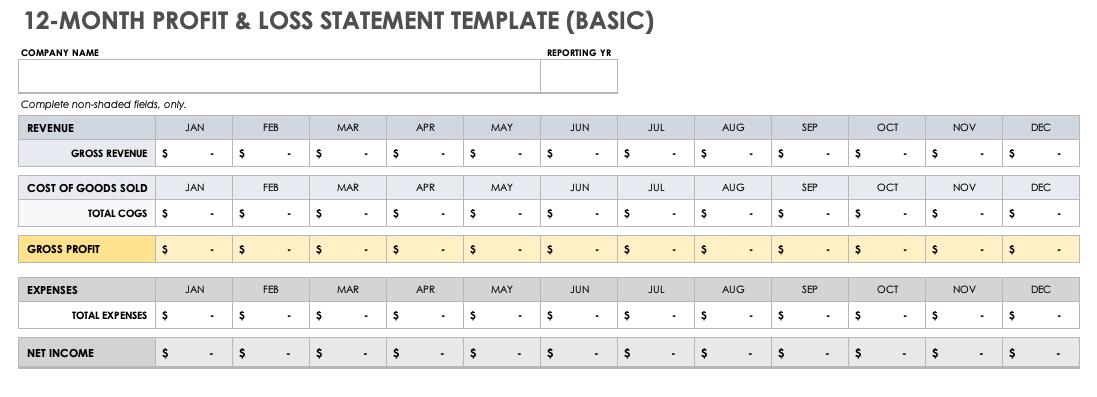
Download Basic 12-Month Profit and Loss Statement Template — Microsoft Excel
This basic profit and loss statement template records finances over the course of 12 reporting periods. Track your revenue, cost of goods sold, and expenses to calculate the gross profit and net income for your small business over 12 months. Review your data and make informed financial decisions for your company’s future.
Detailed 12-Month Profit and Loss Statement Excel Template
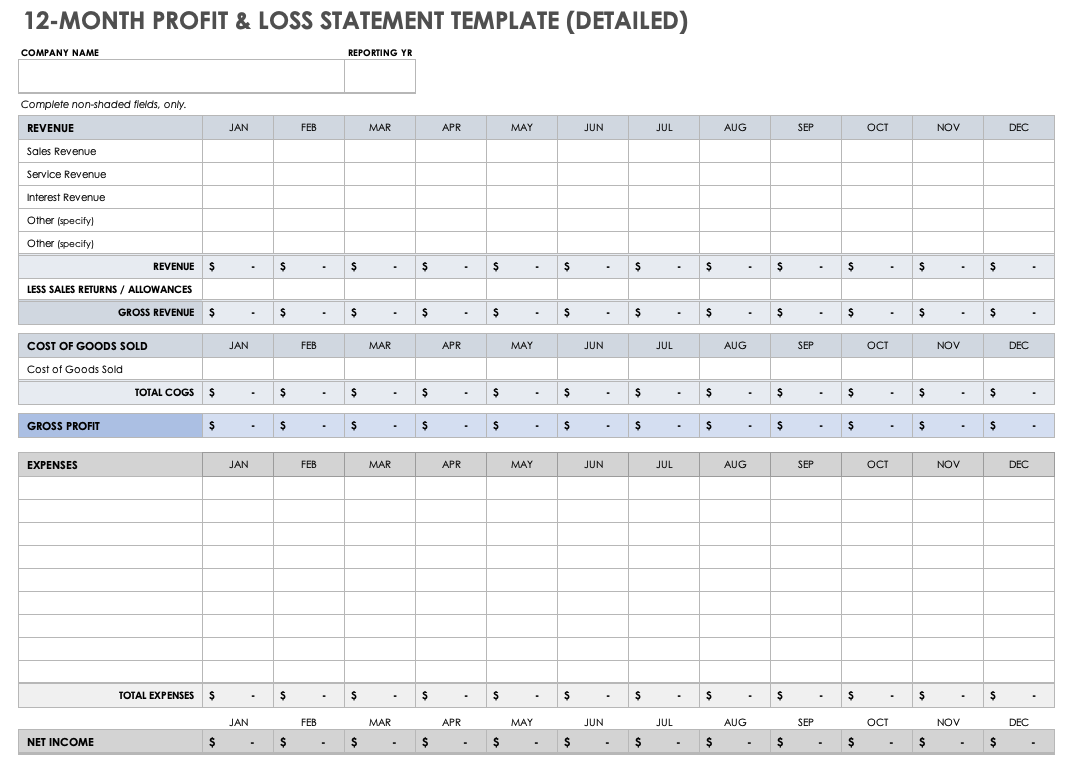
Download Detailed 12-Month Profit and Loss Statement Template — Microsoft Excel
Track your small business expenses in detail over the course of a year. This free template includes individual columns for customizing your revenue and expenses. Itemize categories in this easy-to-use template with built-in formulas that calculate your business revenue, cost of goods sold, expenses, gross profit, and net income. Compare each month’s finances in the context of a full year to improve your financial strategy.
Once you have profit and loss data for several years, you can use our free, customizable three-year profit and loss statement template. For more resources, view our selection of free business plan financial templates to build and maintain a comprehensive financial data system for your small business.
Power Up Your Profit and Loss Statements with Smartsheet
Empower your people to go above and beyond with a flexible platform designed to match the needs of your team — and adapt as those needs change.
The Smartsheet platform makes it easy to plan, capture, manage, and report on work from anywhere, helping your team be more effective and get more done. Report on key metrics and get real-time visibility into work as it happens with roll-up reports, dashboards, and automated workflows built to keep your team connected and informed.
When teams have clarity into the work getting done, there’s no telling how much more they can accomplish in the same amount of time. Try Smartsheet for free, today.